
Ad Server Showcase: "The Trade Desk" (TTD) Tag Implementation and Reporting
Once you've created your tag for The Trade Desk via Upwave's non-CM360-integrated Tag Manager, proceed with the steps below. This article shows you more specific steps for implementing your tag within The Trade Desk, as well as configuring your ad server reporting.
Tag Implementation
Implement Your Upwave Tag
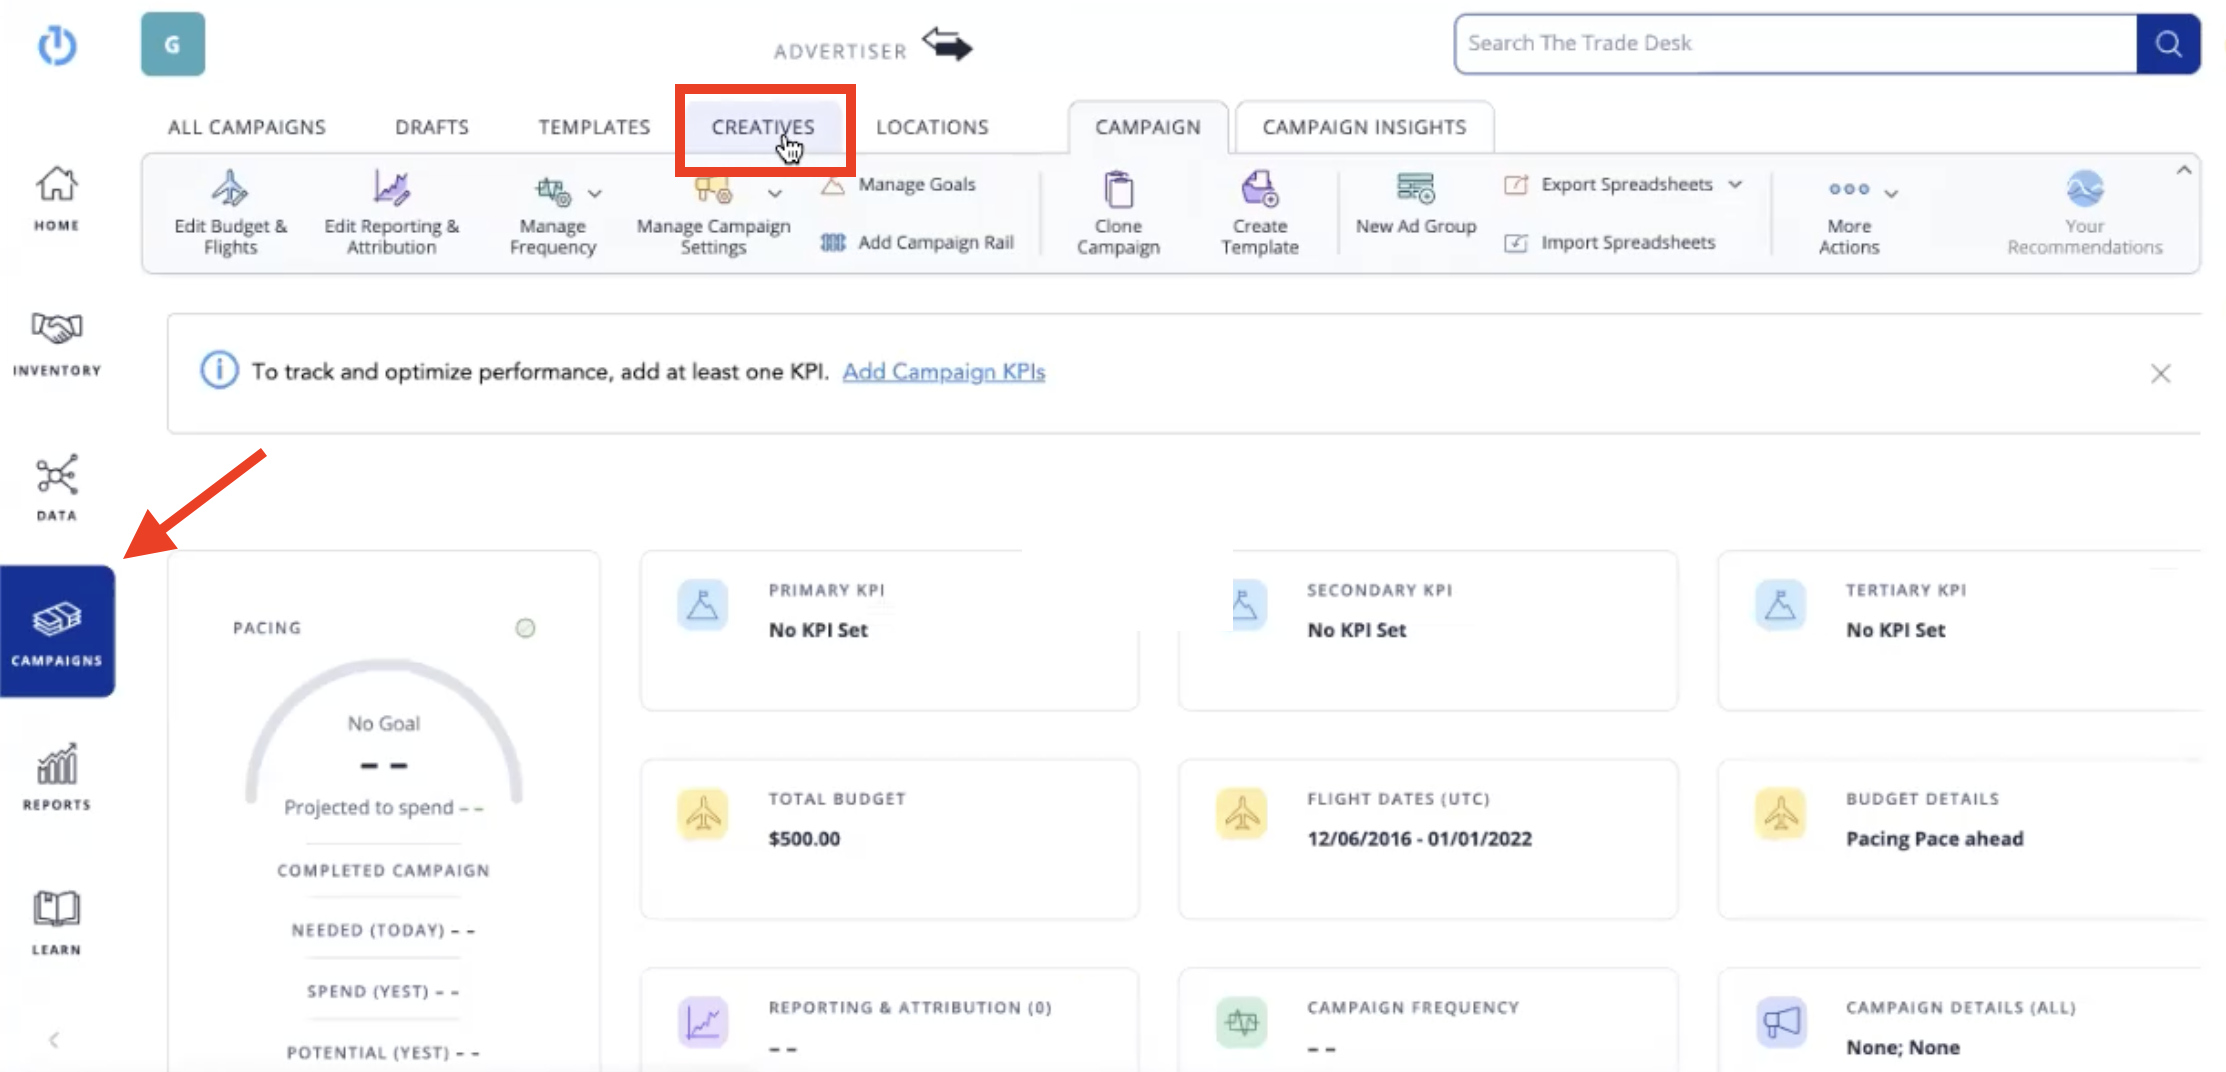
Within your The Trade Desk homepage, click into "Campaigns" on the lefthand nav.
This will expand your upper nav with various options to select from. From there, click into "Creatives".
Proceed based on whether you are uploading a NEW Creative or editing an EXISTING Creative:
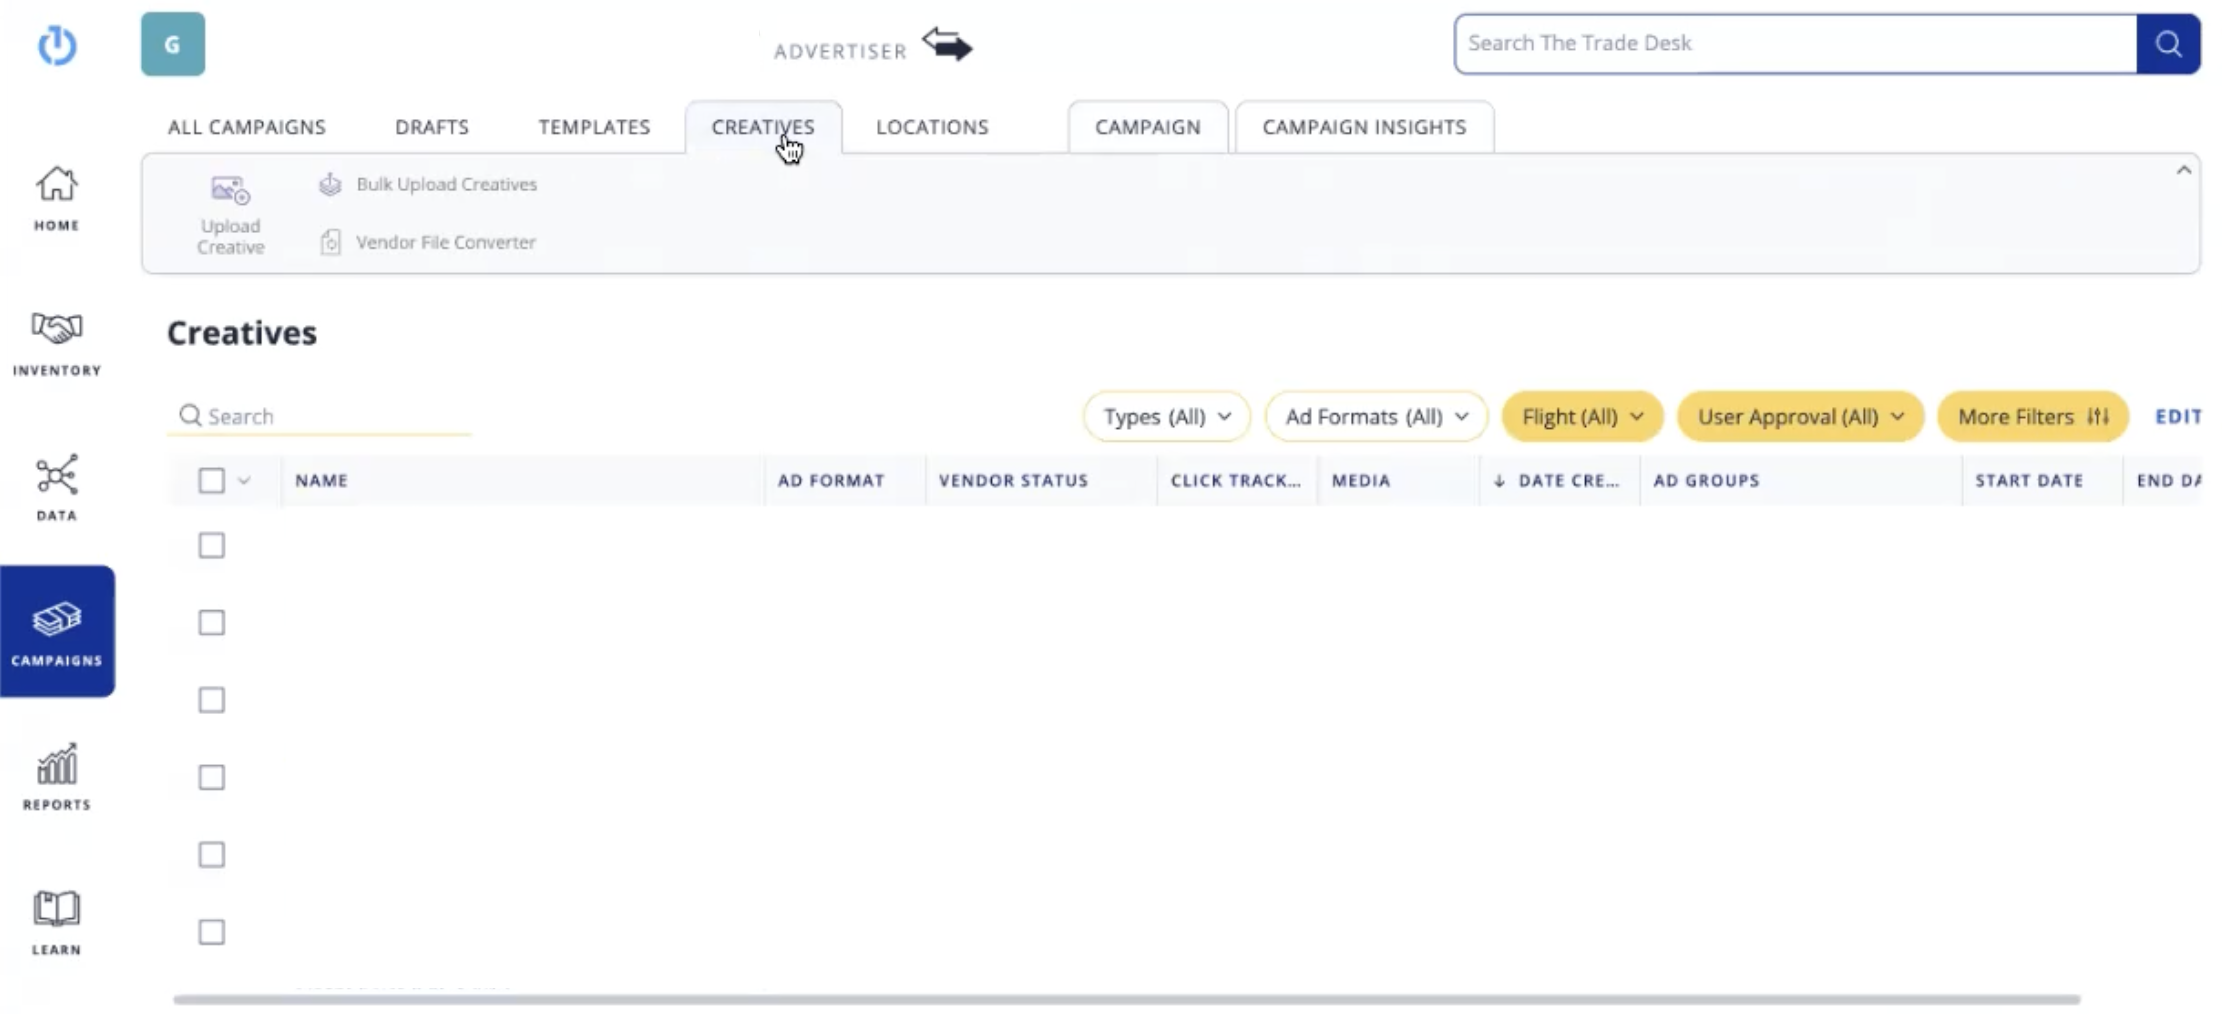
If you are uploading a NEW Creative: Click "Upload Creative" on the top-left. Then, input the following information:
Basic Information: Select the "Creative Type", and input your full ad tag.
Details: Input the details of your creative such as the Creative Name, Ad Format, Landing Page URL, Ad Server, and Creative Placement ID.
Select "Securable" to ensure the creative can serve on securable sites.
Tracking and Destinations: Place the Upwave tag in one of the "1x1 Pixel Impression Tracking URL" text boxes.
Then click "Approve Creative".
Flight Dates: Input the start date and end date for your tag.
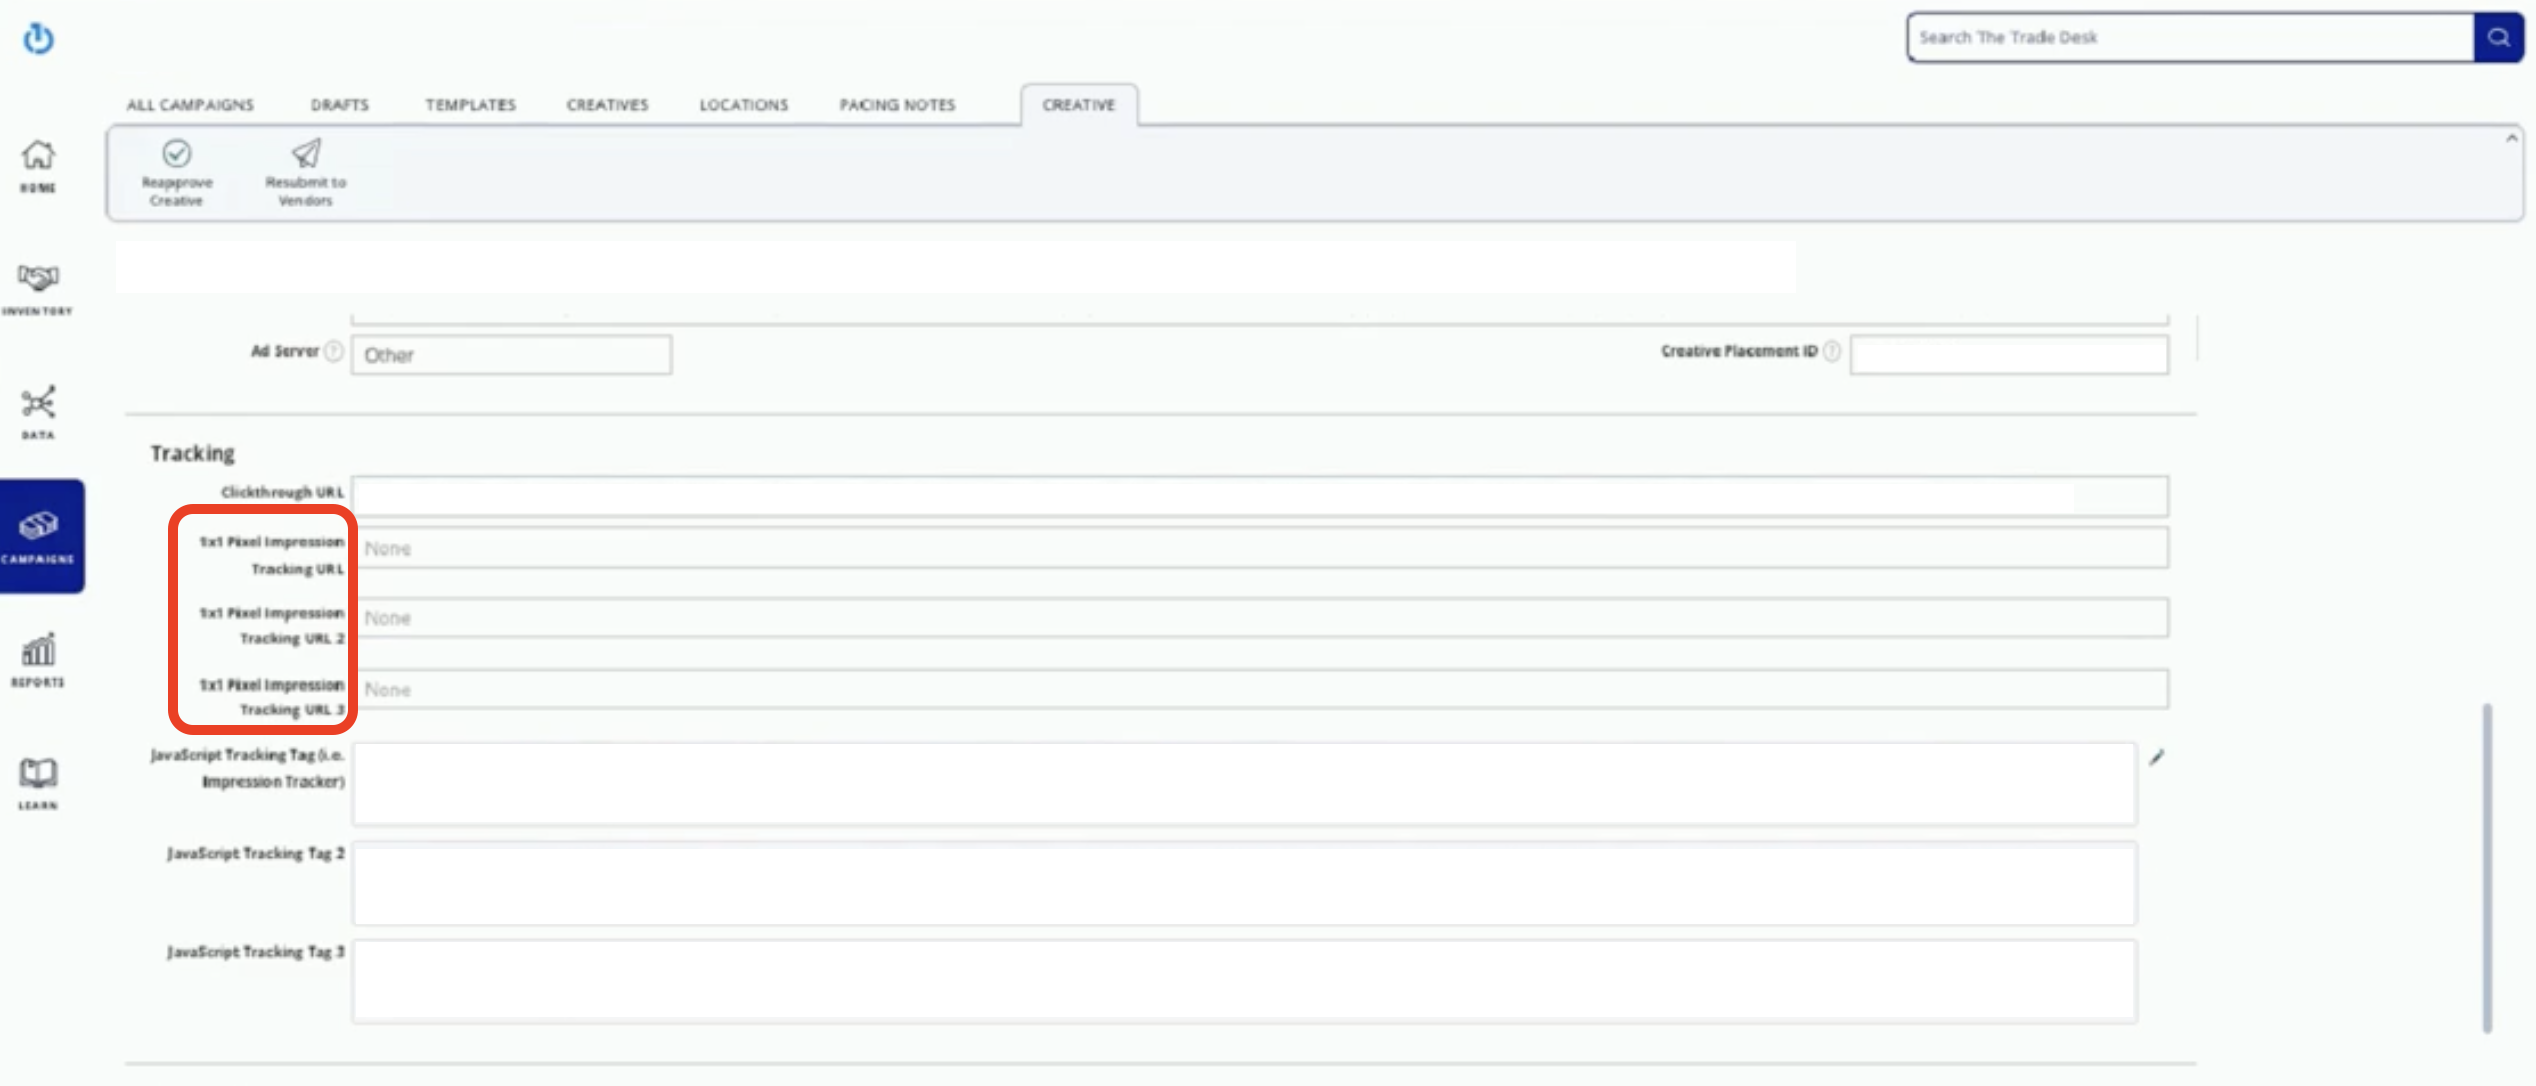
If you are editing an EXISTING Creative:
Search for the creative at the top, or, click into one that's already there.
Navigate to the "Tracking" section where you'll be able to see different tracking parameters, and implement the Upwave tag. The Upwave tag should be implemented in one of the "1x1 Pixel Impression Tracking URL" text boxes.
Then click "Reapprove Creative".
QA Your Implementation
If the tag code is grayed out, that means the tag may not have implemented correctly and needs to be reviewed.
You'll know that the Upwave tag has been successfully implemented when the tag appears in color.
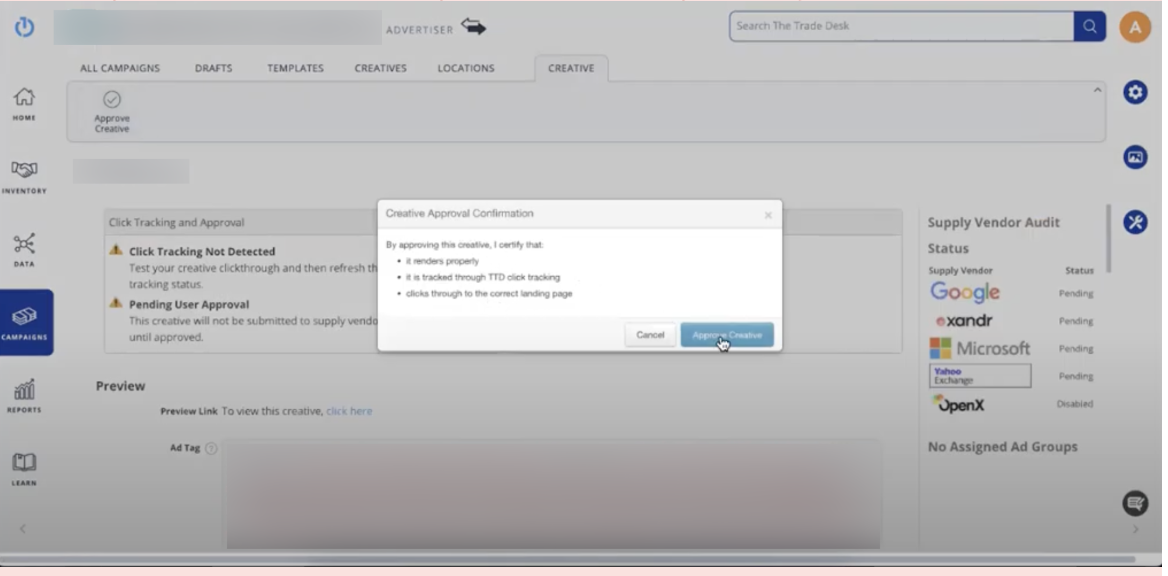
Once the Upwave tag has been implemented successfully, click "Approve Creative" on the "Creative Approval Confirmation" popup (pictured below).
Note: It may take <24 hours for your creative to go through approval within The Trade Desk.
Configuring Ad Server Reporting
Create Your Report
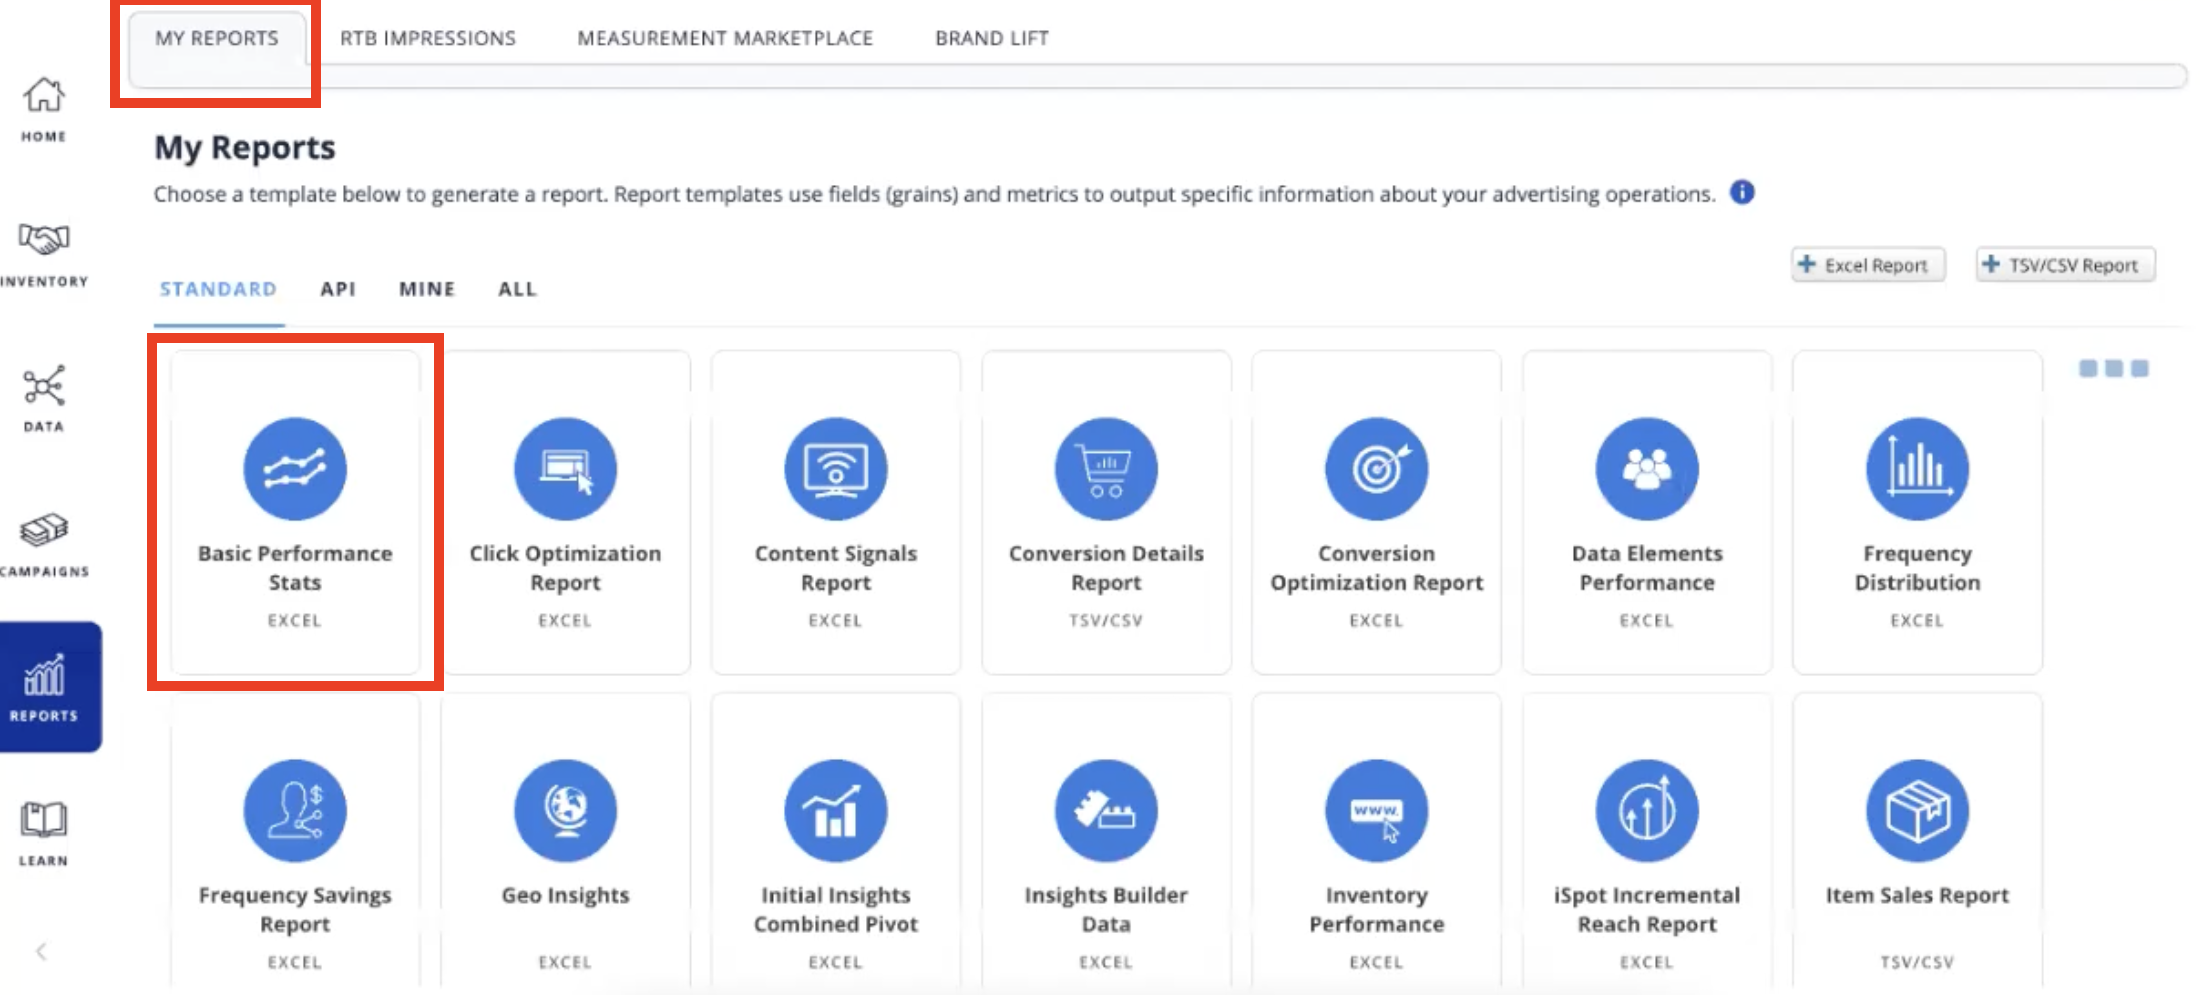
To configure our required ad server reporting, which allows us to QA your tag and map your tactics, click into "Reports" on the lefthand nav.
This will open various reporting options. Click "Basic Performance Stats" to create a new report.
Schedule Your Report
Select "Email this report" to schedule your report delivery to Upwave.
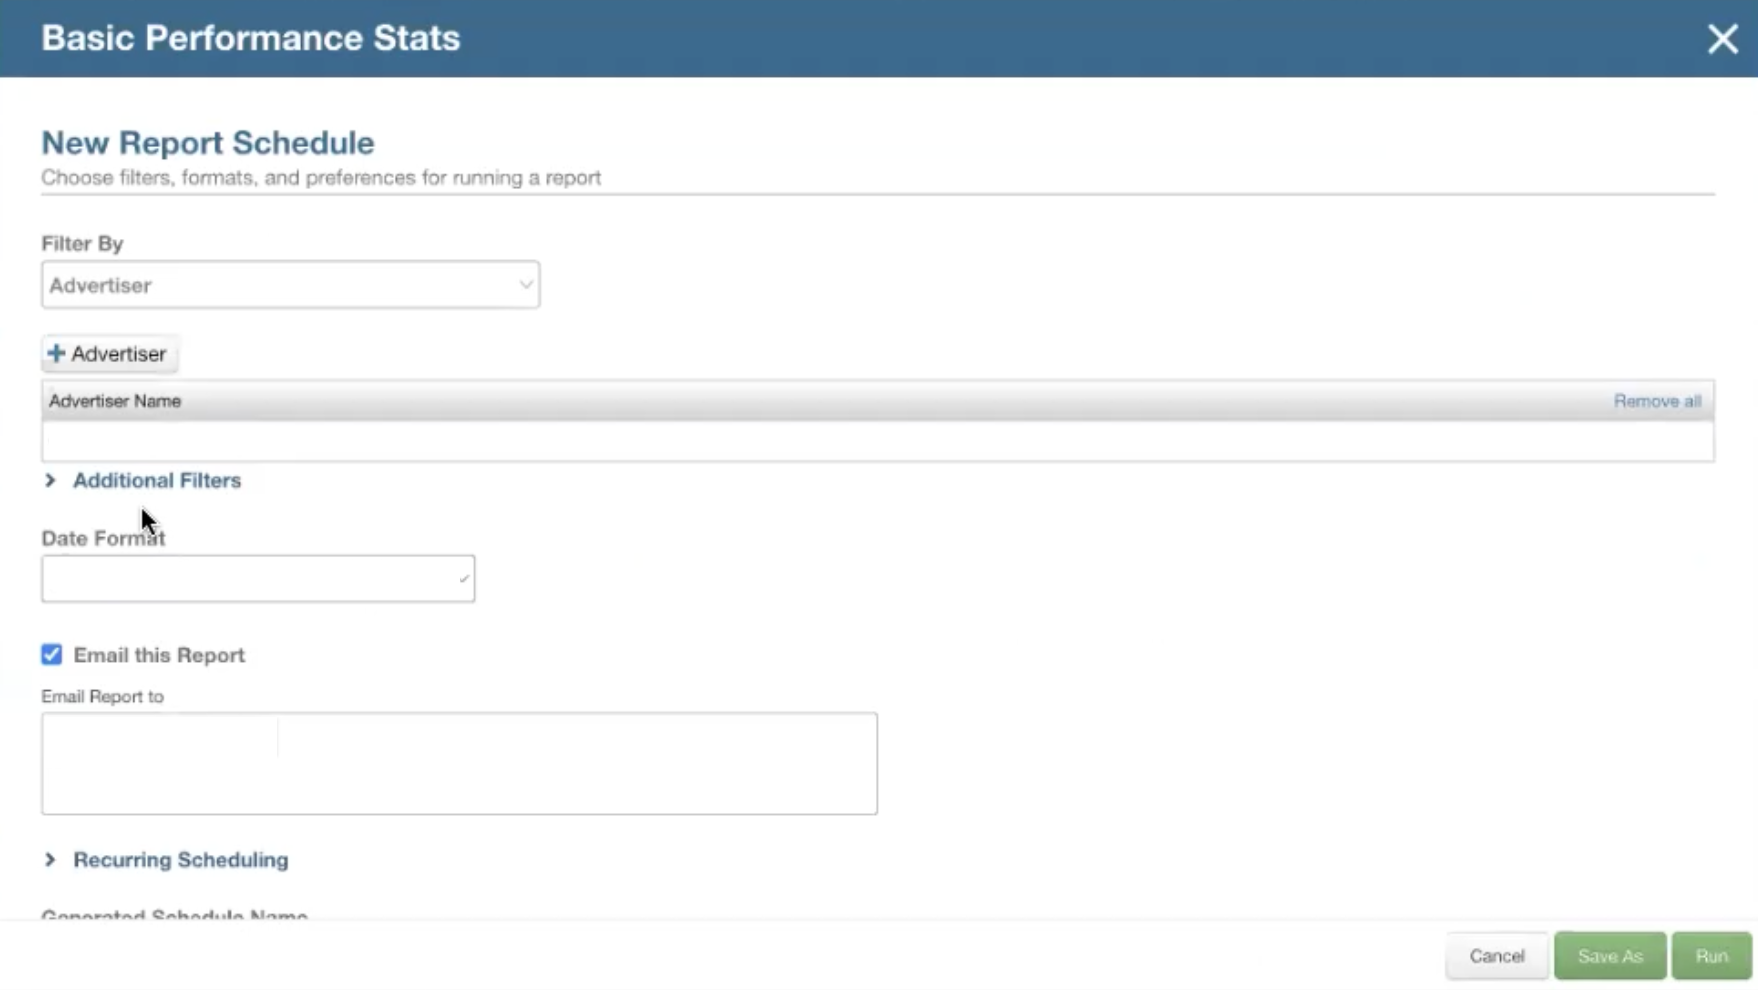
Under "Email Report to", input the "Reporting Email" associated with that tag (which can be found on your Tag Management page within the Upwave platform as pictured below).

Under "Recurring Scheduling", ensure the report sends "Daily".
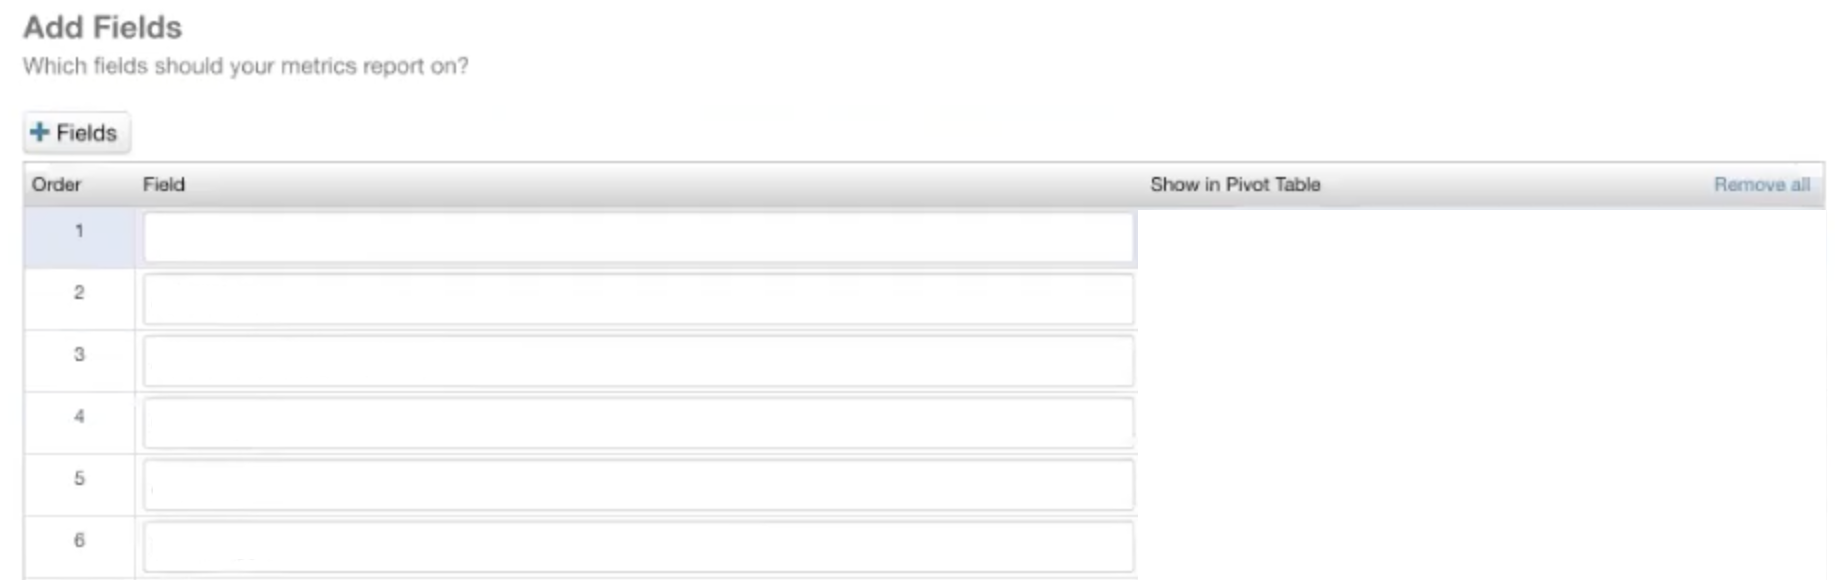
Specify Your Dimensions and Metrics
Once you have scheduled your reporting, click "Review Report Content". Then, add the following dimensions to your report:
Creative ID
Creative
Ad Group ID
Ad Group
Date
Impressions
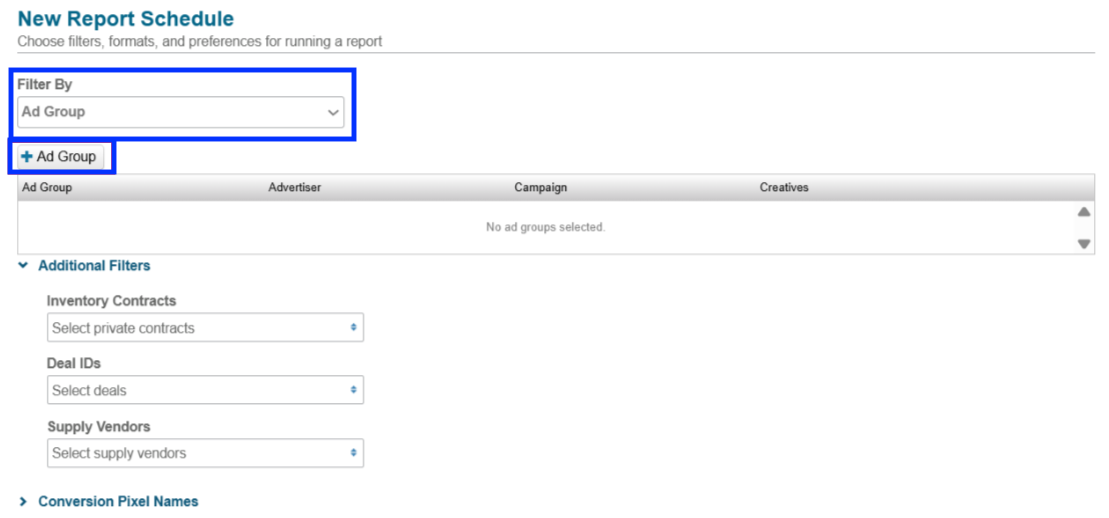
Please note: Impression reporting should only reflect units that you intend for Upwave to measure. In some cases, this may require filtering for specific Ad Group IDs. You can do that using the setting below:
Configure Your File Format and Timezone
The Date Range should include Campaign to Date data (or Last 30 Days at minimum).
The time zone should be set to UTC.
Ensure that your report is configured to send in .csv format. This will provide the raw data export required for our automations.
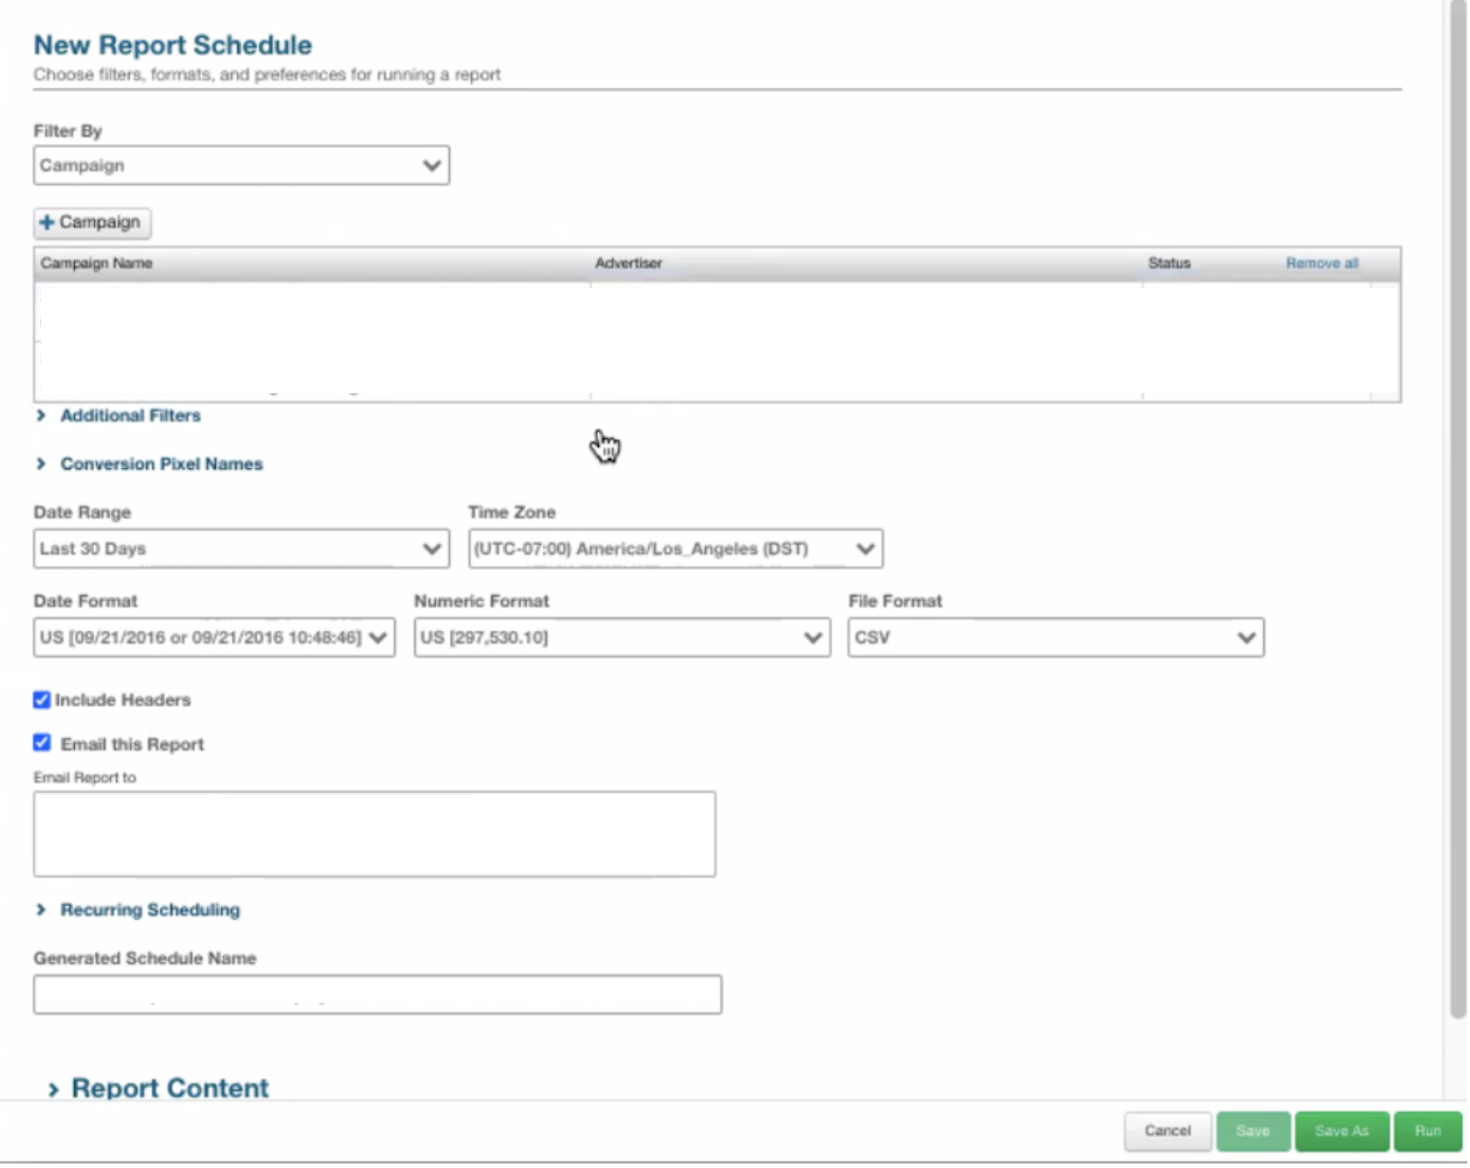
Save Your Report
Once you've completed configuring your report settings, click "Run" to schedule a new report or "Save" to update an existing report that has been edited.
Upwave Support will contact the Ad Ops Contacts designated on the campaign's Notification Settings if anything further is needed.