
Platform Showcase: "Google Ad Manager" (GAM) Tag Implementation and Reporting
Once you've created your tag for GAM via Upwave's non-CM360-integrated Tag Manager, proceed with the steps below. This article shows you more specific steps for implementing your tag within GAM, as well as configuring your impression reporting.
Tag Implementation
Implement Your Upwave Tag
Within your Google Ad Manager (GAM) homepage, click into "Orders" on the left-hand nav, or search for the campaign name in the search bar.
At the order level, click into the relevant line item.
Navigate to the "Creatives" tab, where you will input your tracking information.
Proceed with implementing the Upwave tag based on the unit type:
Standard Banners:
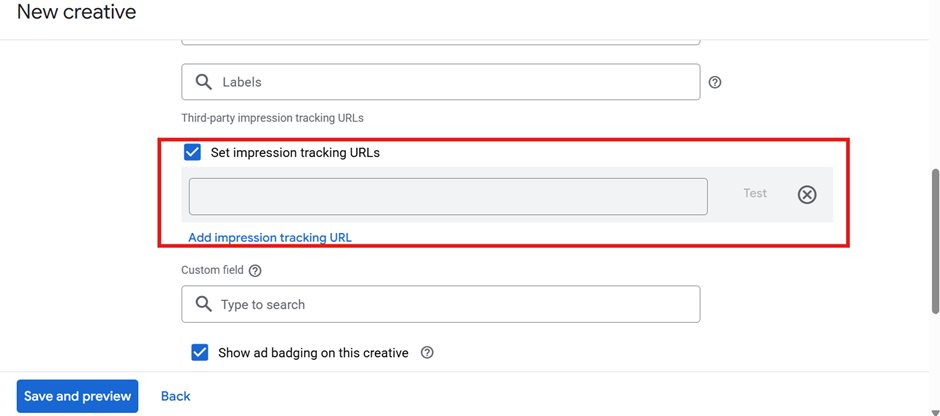
Select the "Standard" radio button.
Paste the Upwave tag into the field, "Third-party impression tracking URL".
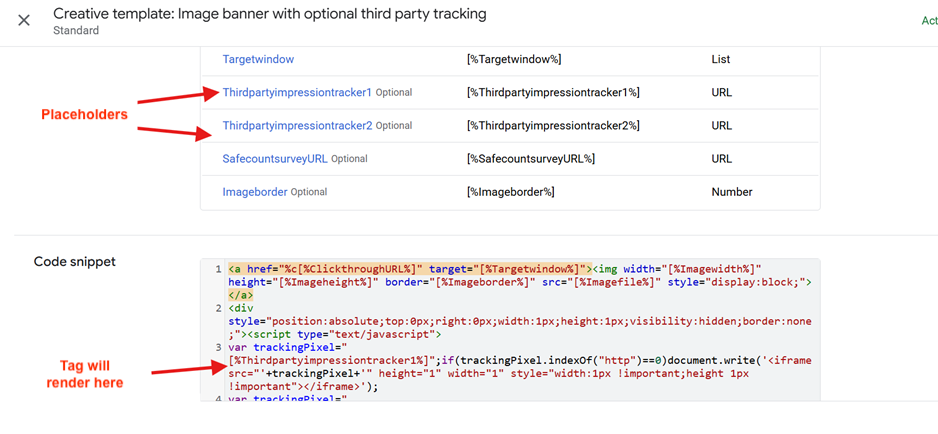
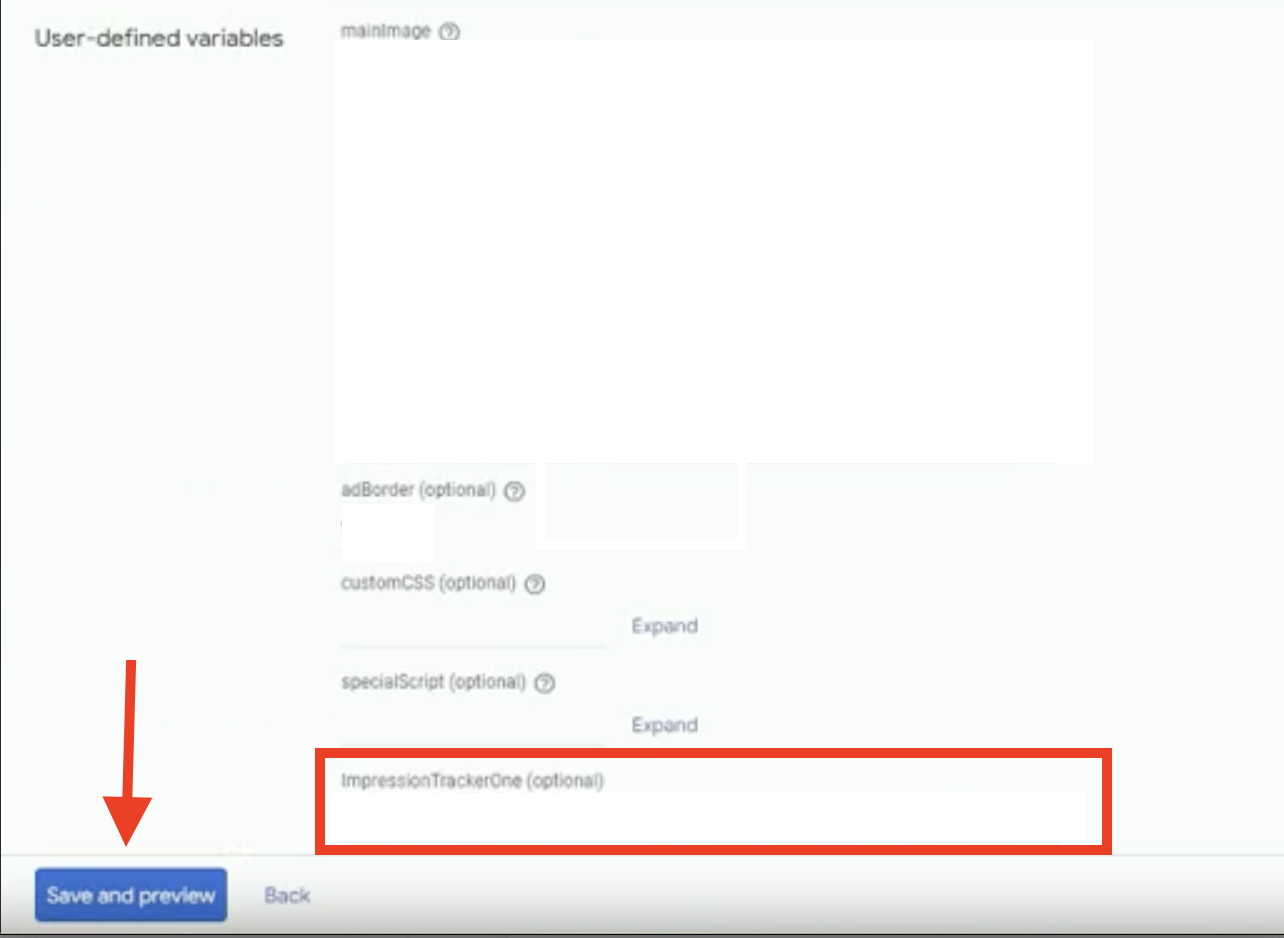
Custom Units:
In the "User-defined variables" section, locate "Impression Tracker".
Paste the Upwave tag into "Impression Tracker" at the bottom of the creative code.
QA Your Implementation
Once you've completed your implementation, click "Save and Preview" on the bottom of the Creatives page.
Navigate to the "Preview" tab to ensure the creative is displayed correctly (a common error would include the tag code being displayed in the creative).
Configuring Impression Reporting
Create Your Report
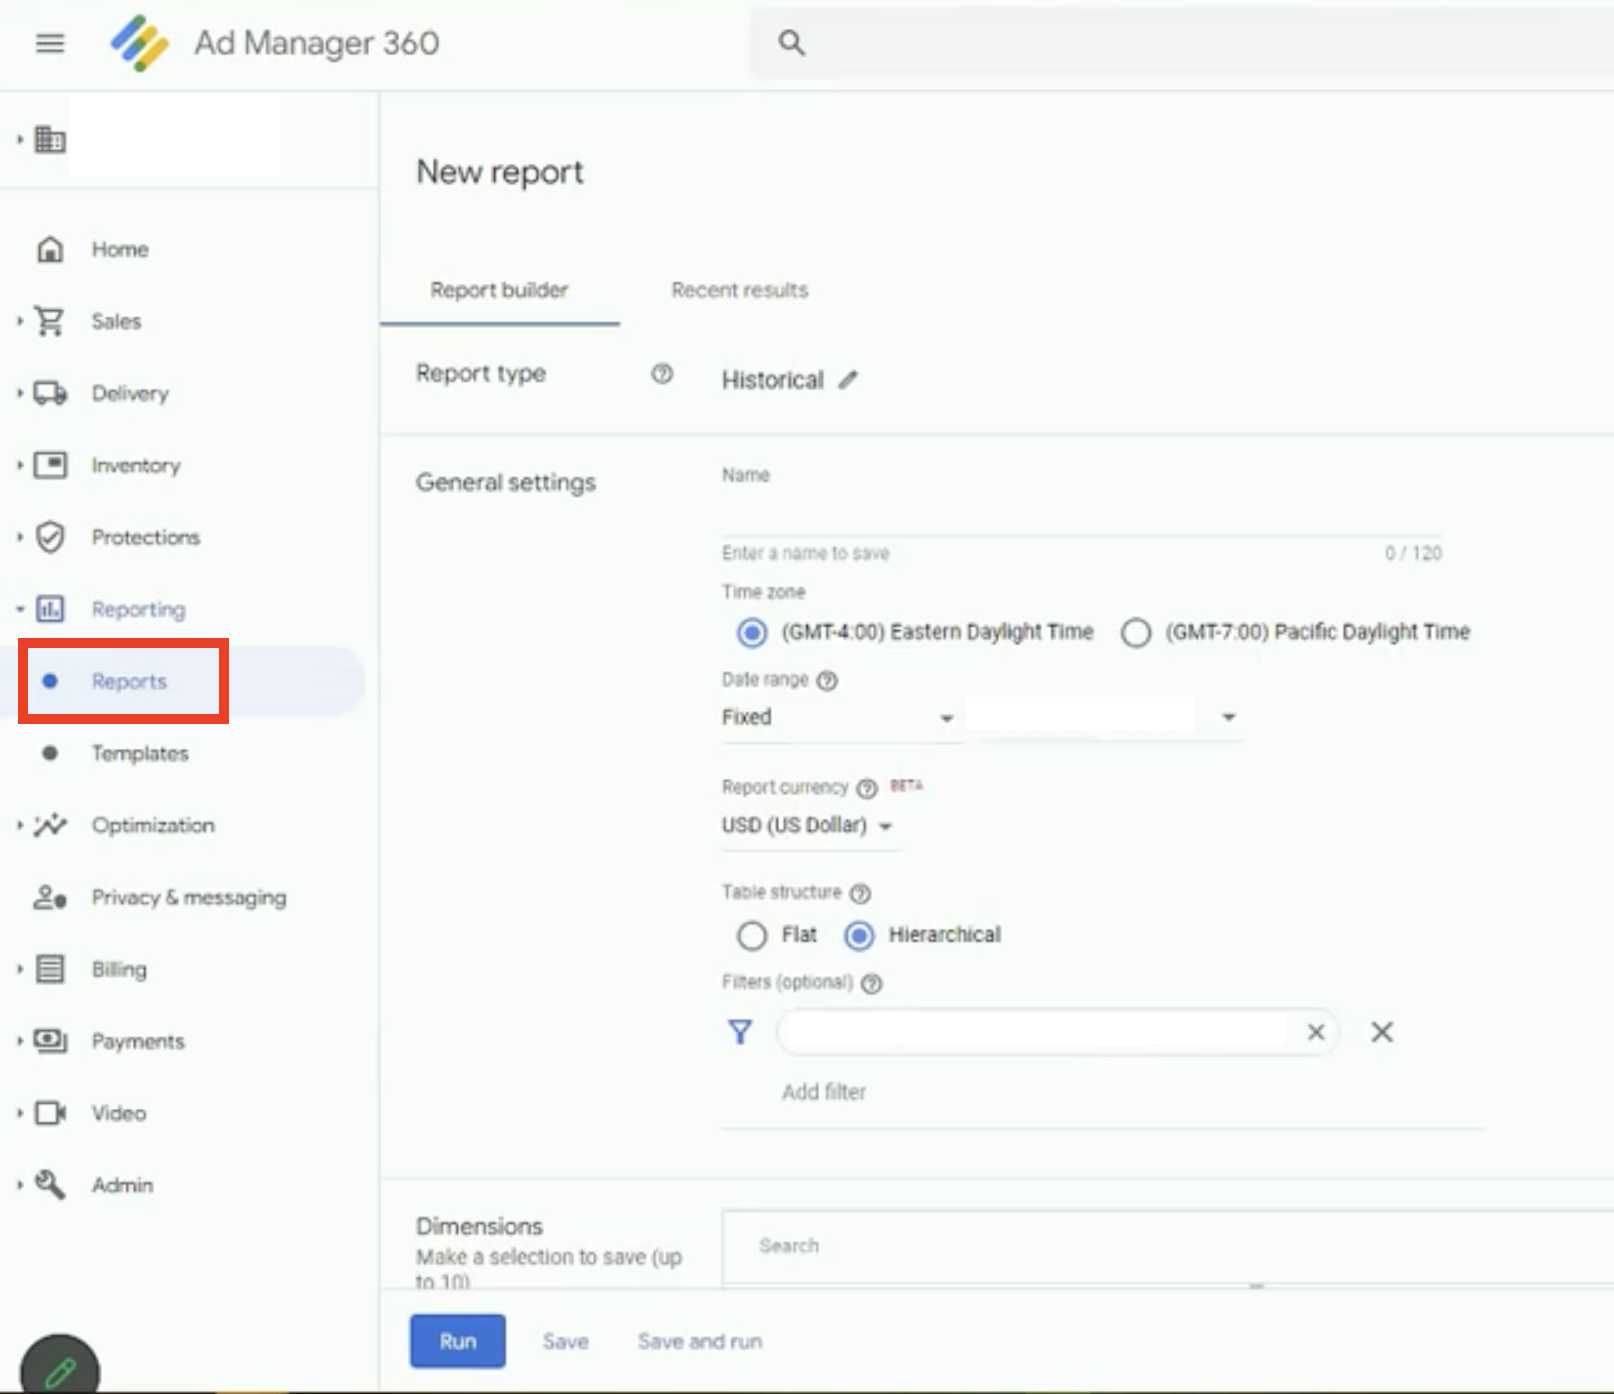
To configure our required impression reporting, which allows us to QA your tags and map your tactics, click into "Reports" on the lefthand nav to create a new report via the Report Builder.
Specify Your Dimensions and Metrics
Include the following (6) dimensions in your impression reporting:
Creative level ID
These represent the IDs coming through the 1st macro position of your tag, which is traditionally %ecid! for a GAM tag.
These are usually reflected as Creative ID or Master and Companion creative ID in GAM reporting.
Creative-level Name
This represents the Names that correspond to the IDs above.
These are usually reflected as Creative or Master and Companion creative in GAM reporting.
Placement-level ID
These represent the IDs coming through the 2nd macro position of your tag, which are traditionally one of the following:
If your Upwave tag uses %eaid!: This is usually reflected as Line Item ID in GAM reporting.
If your Upwave tag uses %epid!: This is usually reflected as Ad Unit ID in GAM reporting.
Placement-level Name
This represents the Names that correspond to the IDs above.
If your Upwave tag uses %eaid!: This is usually reflected as Line Item in GAM reporting.
If your Upwave tag uses %epid!: This is usually reflected as Ad Unit in GAM reporting.
Date
This is the date of the impression level exposure event, and is usually reflected as Date in GAM reporting.
Impressions
This is the impression level exposure event, and is usually reflected as Total impressions or Ad server impressions in GAM reporting.
Schedule Your Report
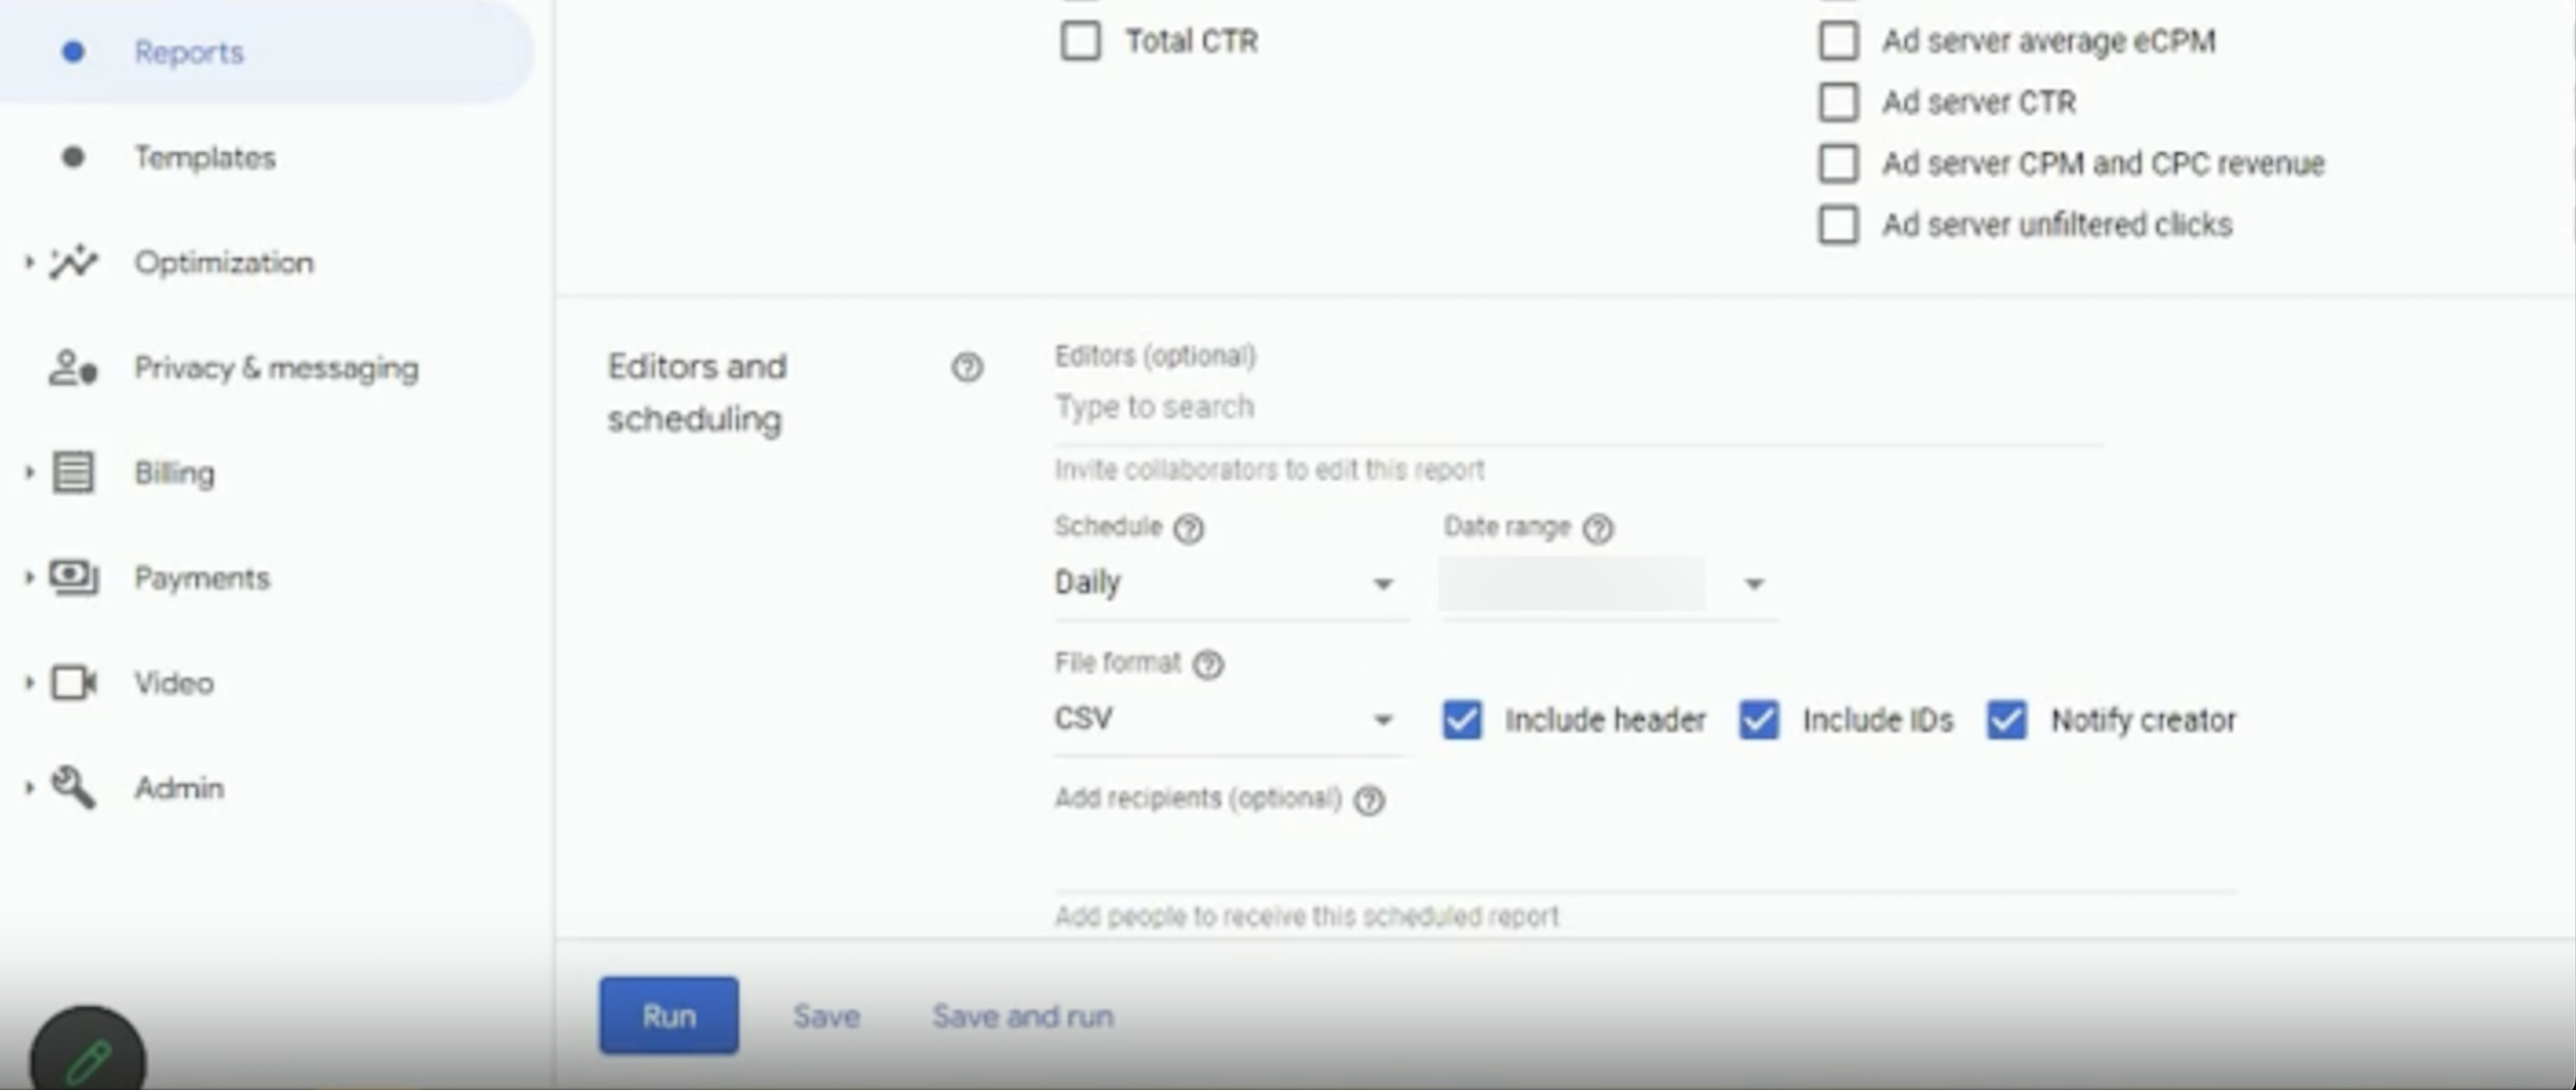
Under "Editors and Scheduling", schedule the report on a "Daily" cadence.
The Date Range should include Campaign to Date data (or Last 30 Days at minimum).
The file should be .csv format, and include "headers" and "IDs".
When adding recipients, be sure to input the "Reporting Email" associated with your GAM tag (which can be found on your Tag Management page within the Upwave platform as pictured below).

Save Your Report
Once you've completed configuring your report settings, click "Run" to schedule a new report or "Save" to update an existing report that has been edited.
Upwave Support will contact the Ad Ops Contacts designated on the campaign's Notification Settings if anything further is needed.