
Ad Server Showcase: "Campaign Manager 360" (CM360) Tag Implementation and Reporting
Note: This article outlines implementation instructions for CM360-served placements. If you are looking for implementation instructions for Site-served placements via the CM360-integration, please use this article instead.
Once you've created your tag for CM360-served placements, proceed with the steps below. This article shows you more specific steps for implementing your tag within CM360, as well as configuring your ad server reporting.
Tag Implementation
Impression Event Tag Properties
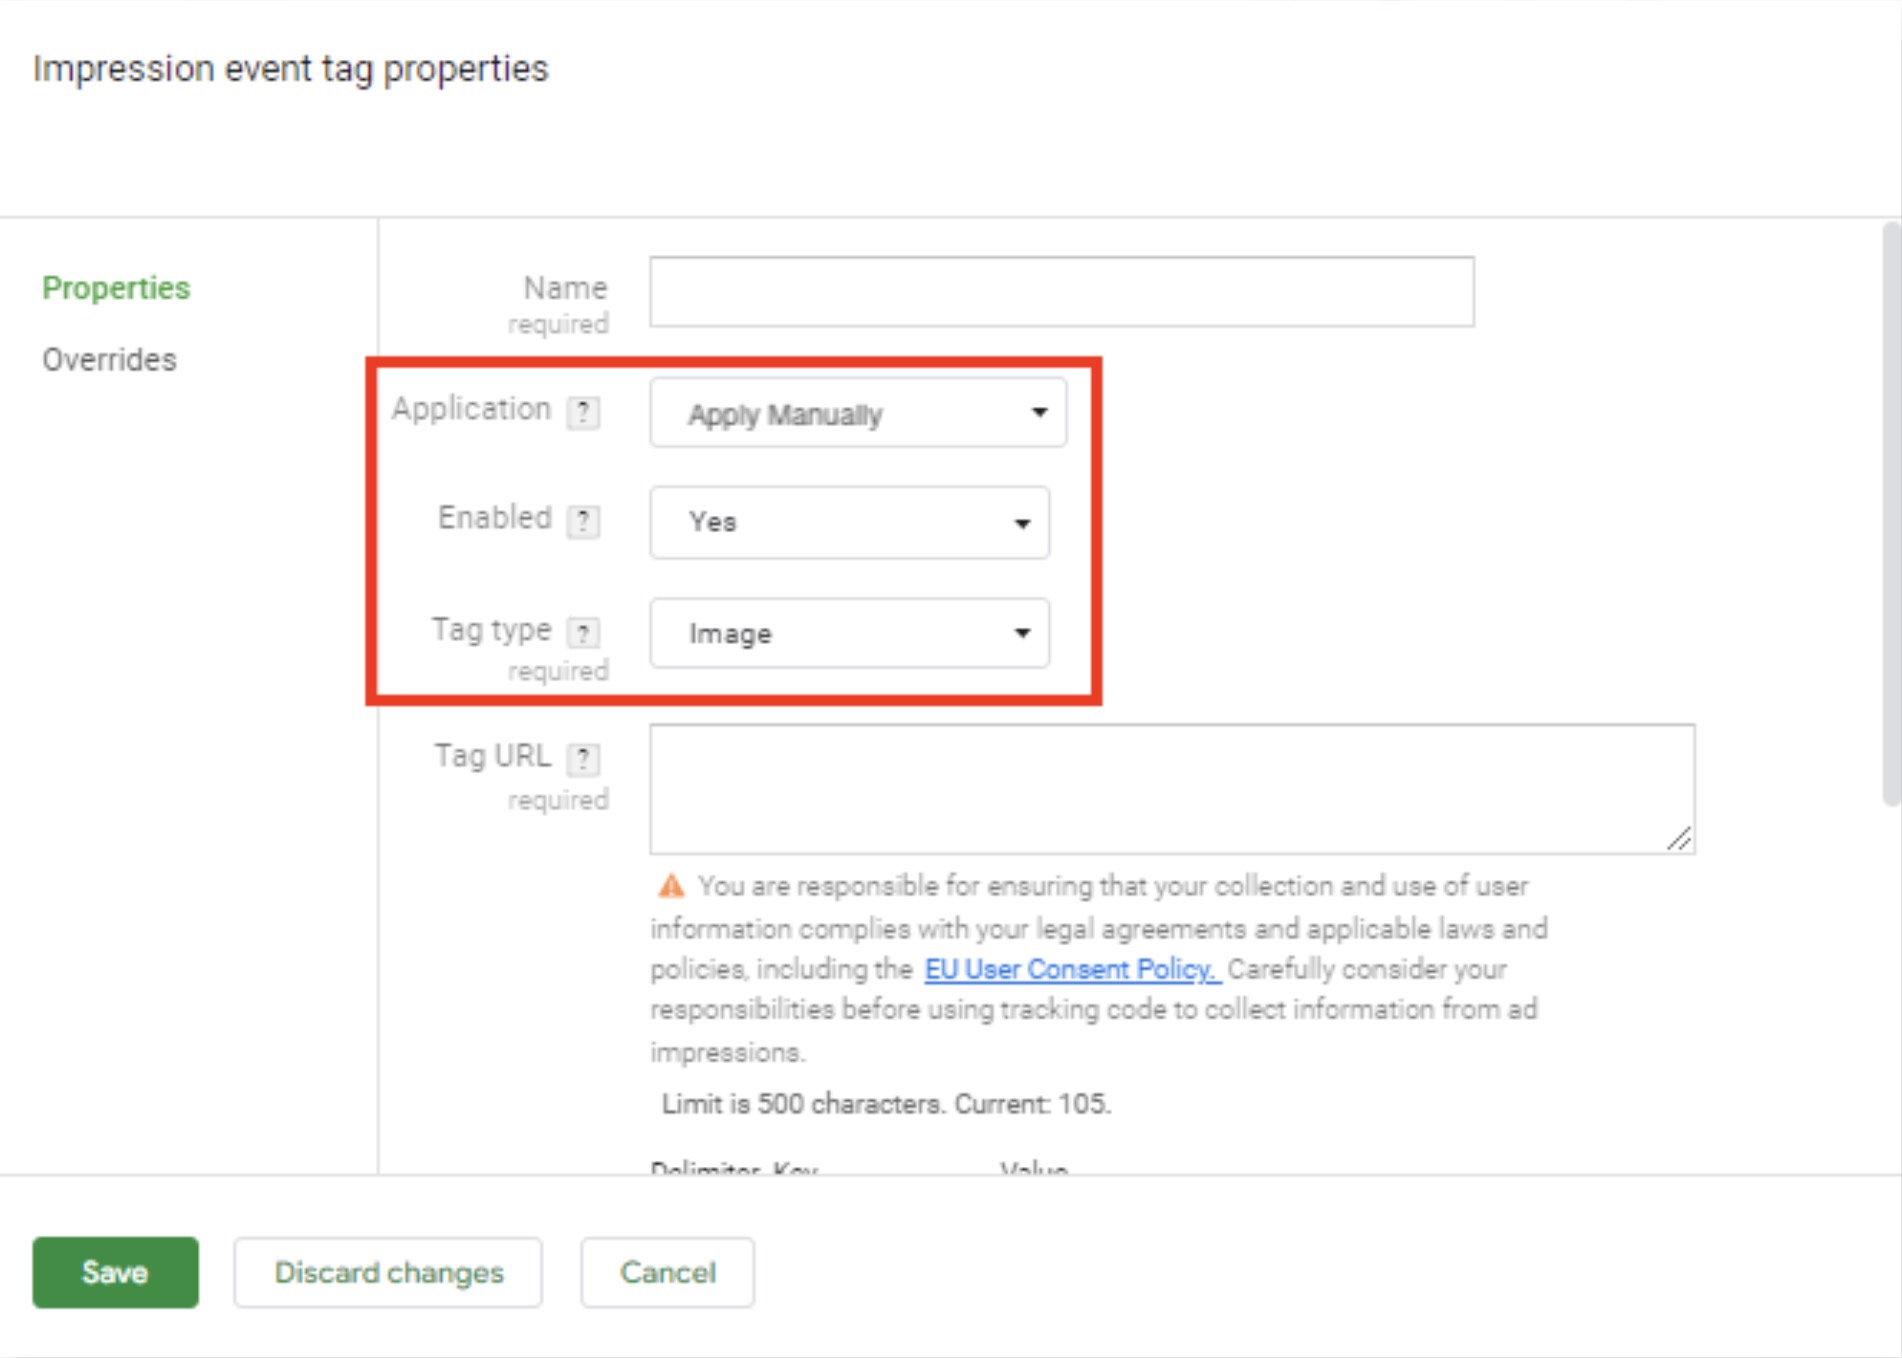
The "Impression Event Tag Properties" should match the following:
Application: Apply Manually
Enabled: Yes
Tag Type: Image
Tag URL: Input the URL of the tag only.
Settings are set to "Always Apply"
Ensure the tag is set to "Always Apply". Specifically on ad level, and campaign and advertiser level. (CM360 defaults this to "Don't Apply", so this setting must be configured manually.)

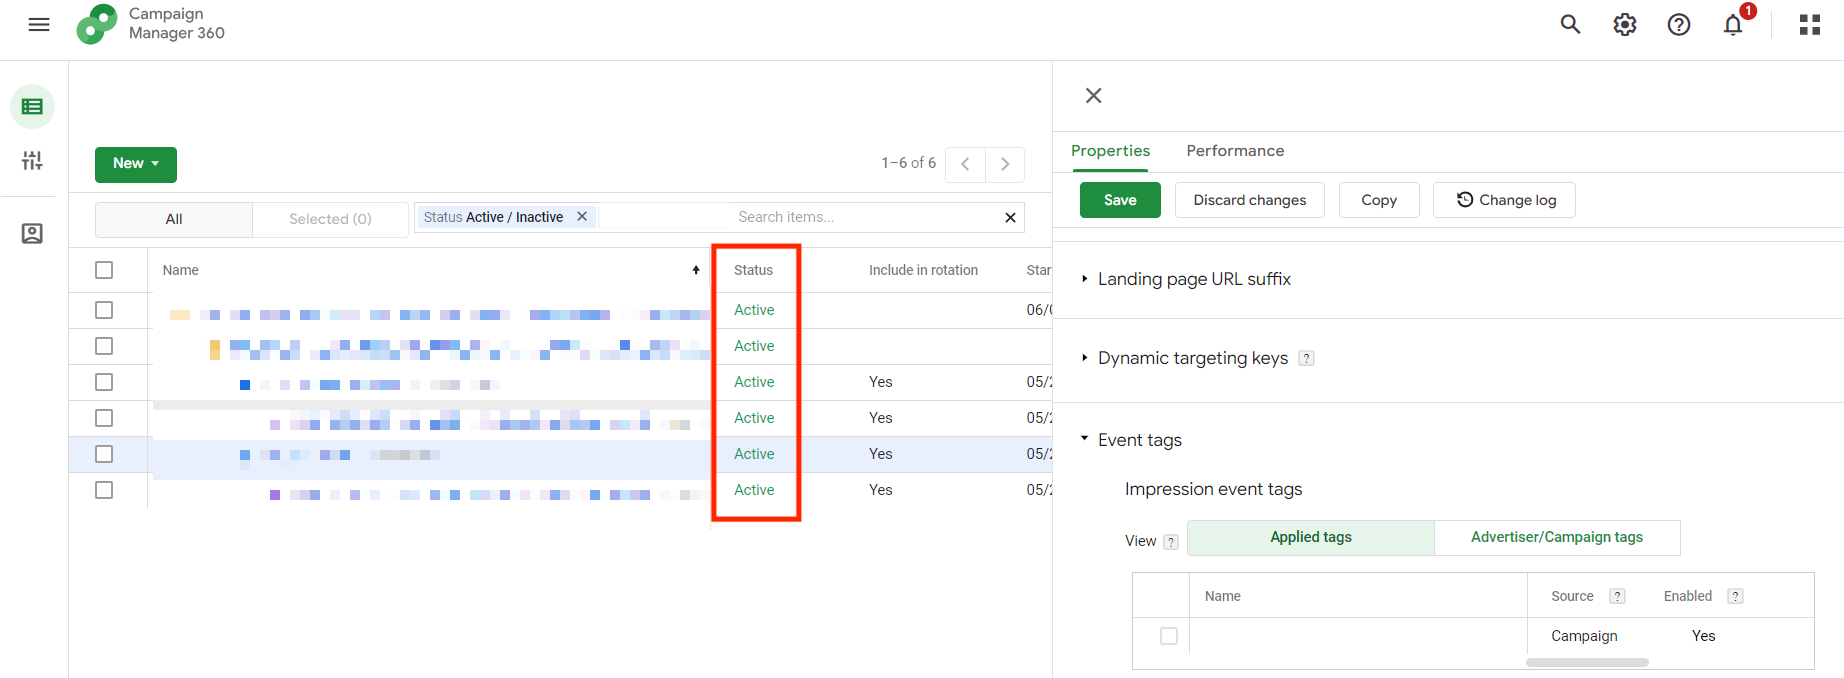
Settings are set to "Active"
When reviewing your placements, you see their status read as "Active".
Configuring Ad Server Reporting
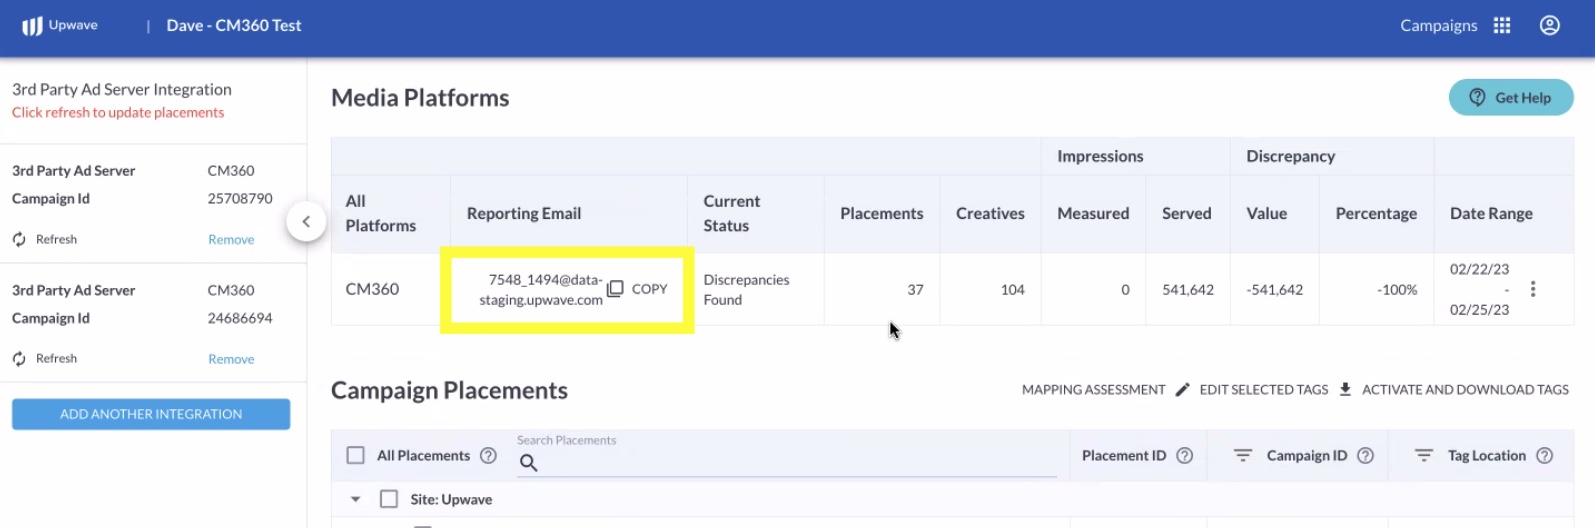
Delivery Address
At the top of your Tag Manager, you will find your "Reporting Email". Your report must be sent to this Reporting Email in order for our system to find it.
Delivery Cadence
Automated "Daily"
Date Range
The Date Range should include Campaign to Date data (or Last 30 Days at minimum).
Timezone
UTC (or GMT)
Filters
Please only include placements in which the Upwave tag was implemented (include both CM360-served and Site-served placements if you are using our CM360 integration).
If you are measuring multiple CM360 Campaign IDs, please ensure all Campaign IDs are included in your report.
Specify Your Dimensions and Metrics
Creative ID
Creative
Placement ID
Placement
Date
Impressions