CM360-Integrated Tags: Creation, Implementation, and Reporting
Note: "CM360-integrated" refers to our platform's CM360 integration. If you're using CM360 as your primary ad server, and have already integrated your CM360 Campaign ID(s), please proceed with the tagging instructions below.
Overview
Upwave's Tag Manager makes it fast and easy for you to create tags on-demand for measuring your campaign. We've worked with hundreds of media partners to build a comprehensive tagging library that pass creative and placement-level details from your ad server directly into the Upwave platform. This allows you to achieve cut-level insights for monitoring the performance of your campaign.
This article shows you how to use Upwave's Tag Manager and implement those tags successfully!
Measure Your Campaign with Upwave Tags
Create Your Tags
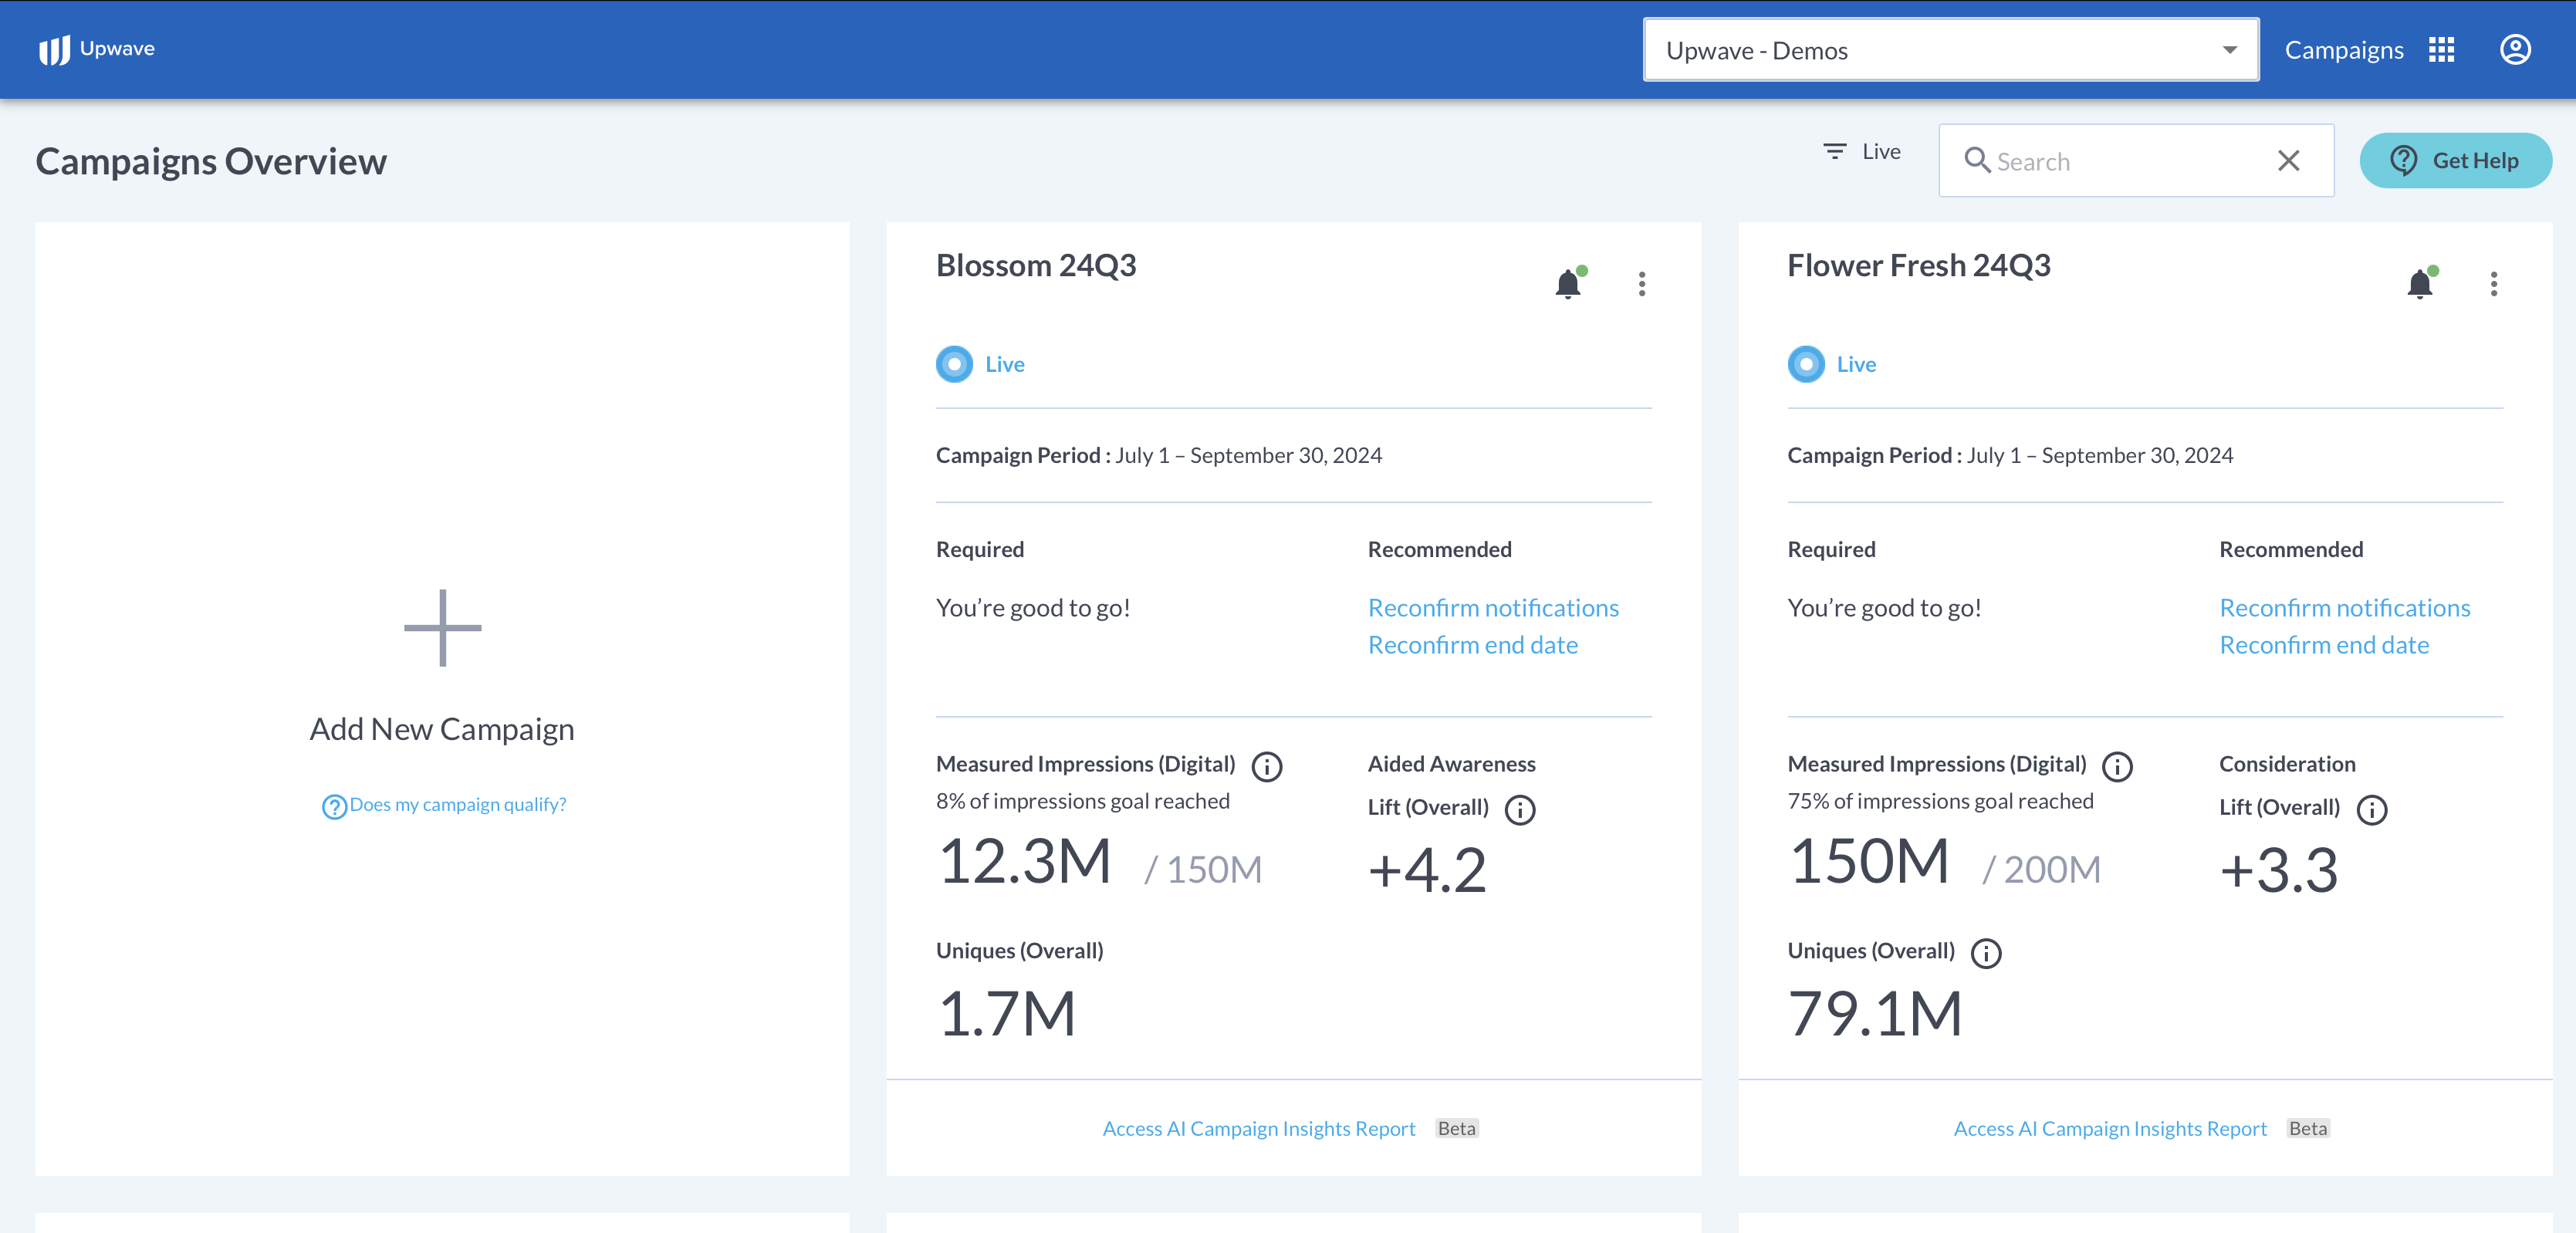
Log into your account on app.upwave.com. Here, you'll see the 'Campaign Cards' associated with your account.
Note: If you don't have a login, ask the person who created the campaign to invite you to their Team using the Team dropdown in the upper-right of the platform. When they do, you'll receive an email that you can use to login.
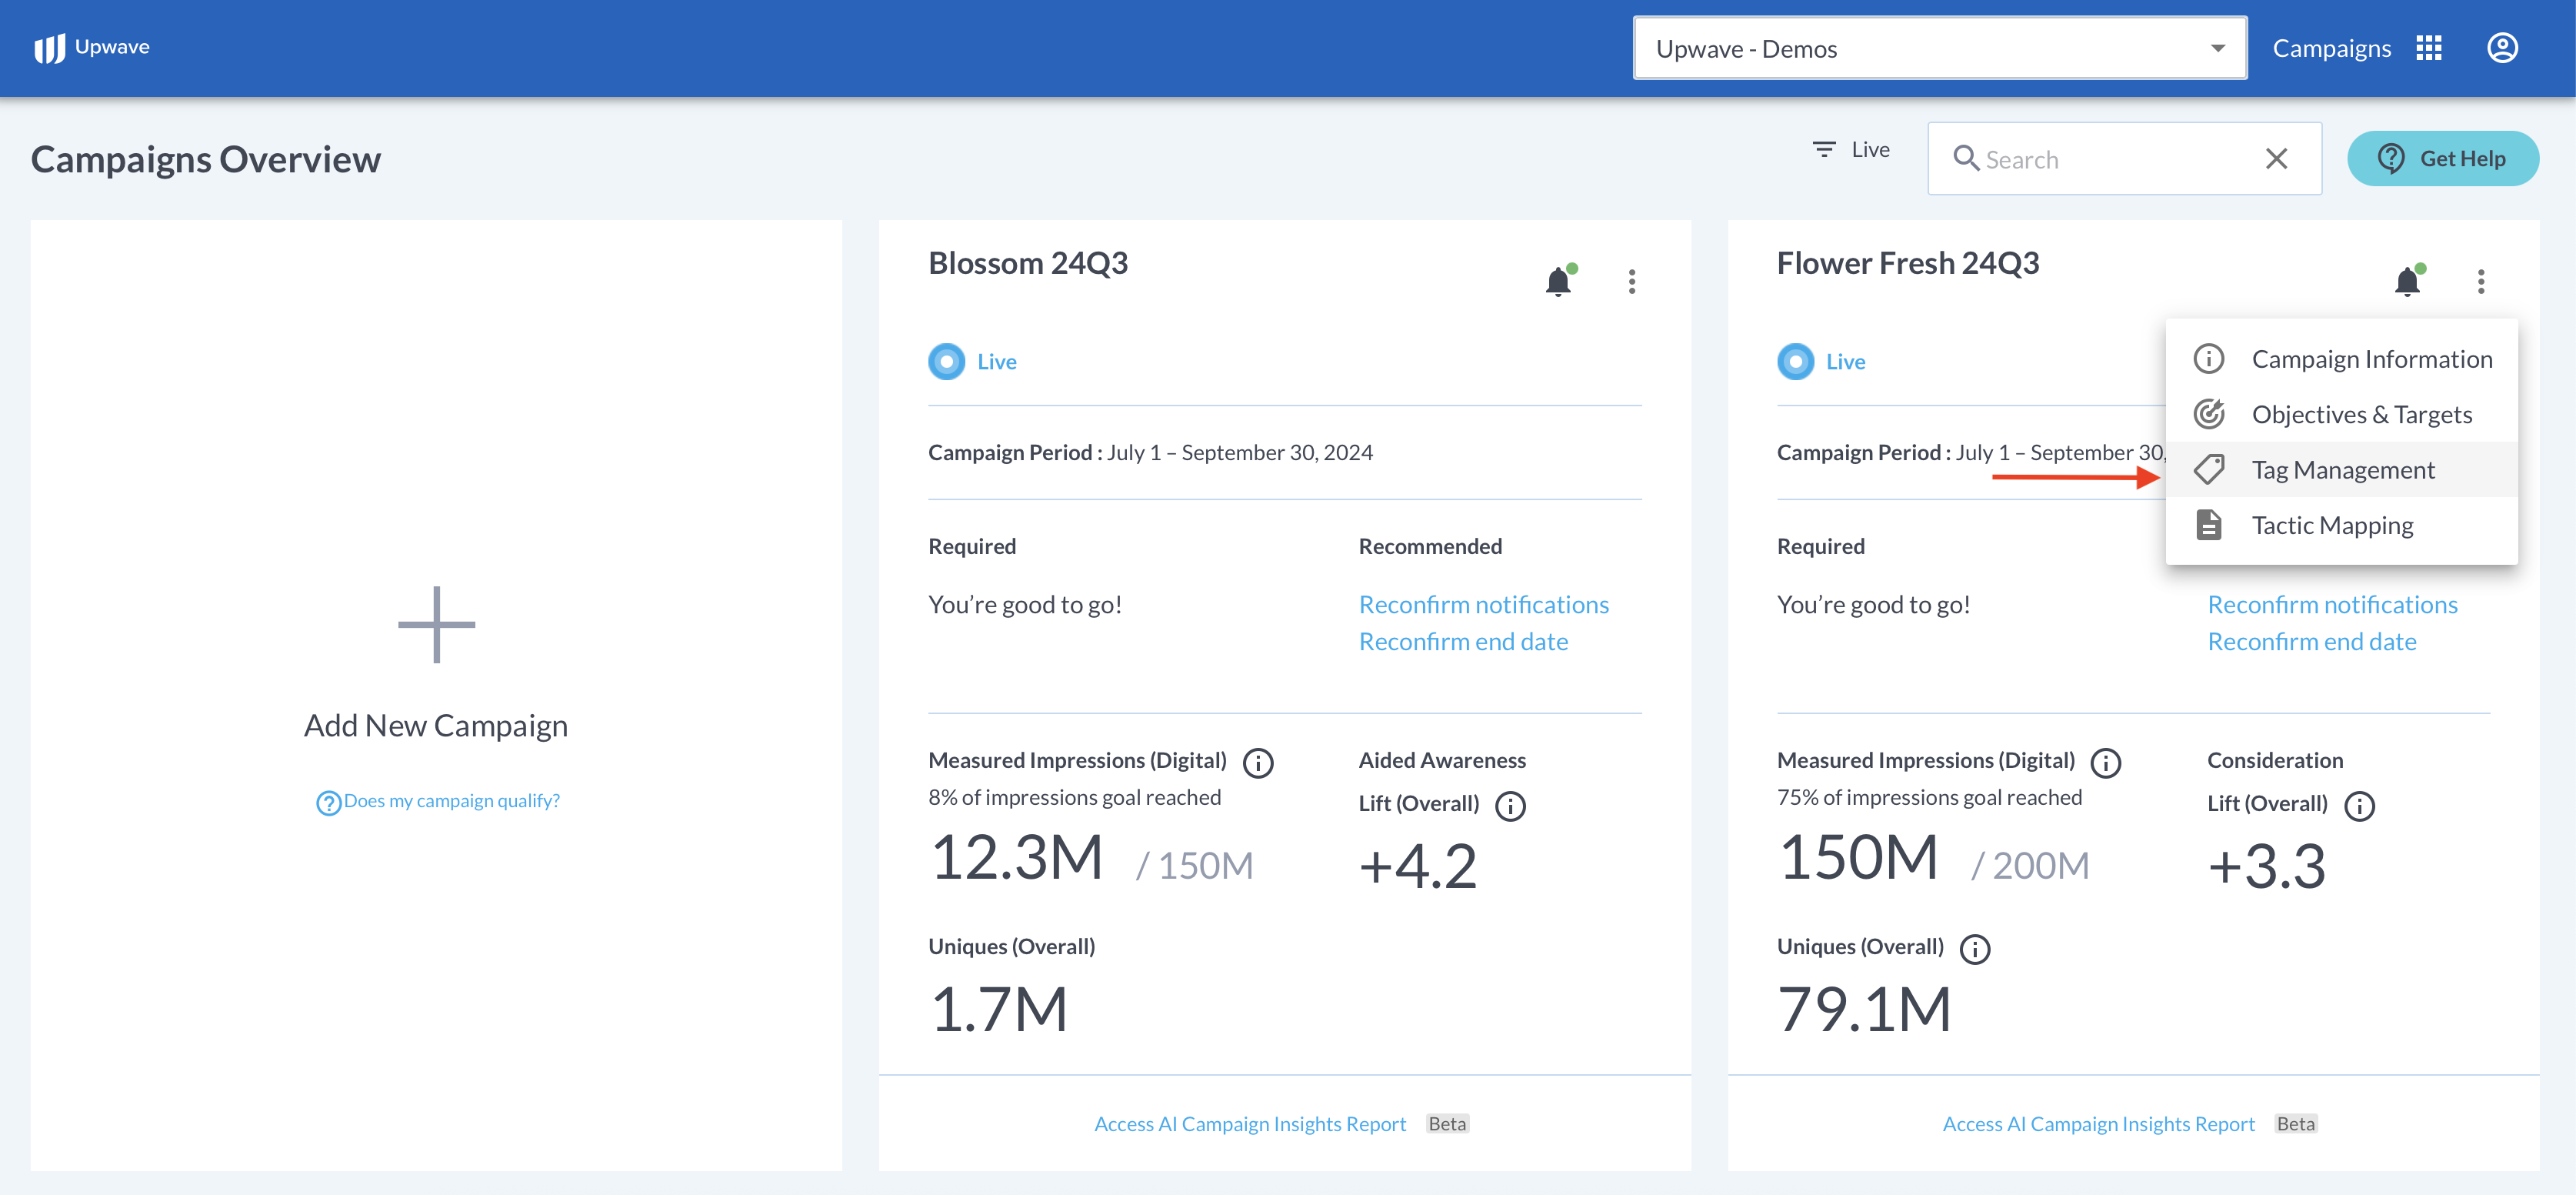
Click the ellipses in the top-right of the Campaign Card that you would like to create tags for. Then, select "Tag Management":
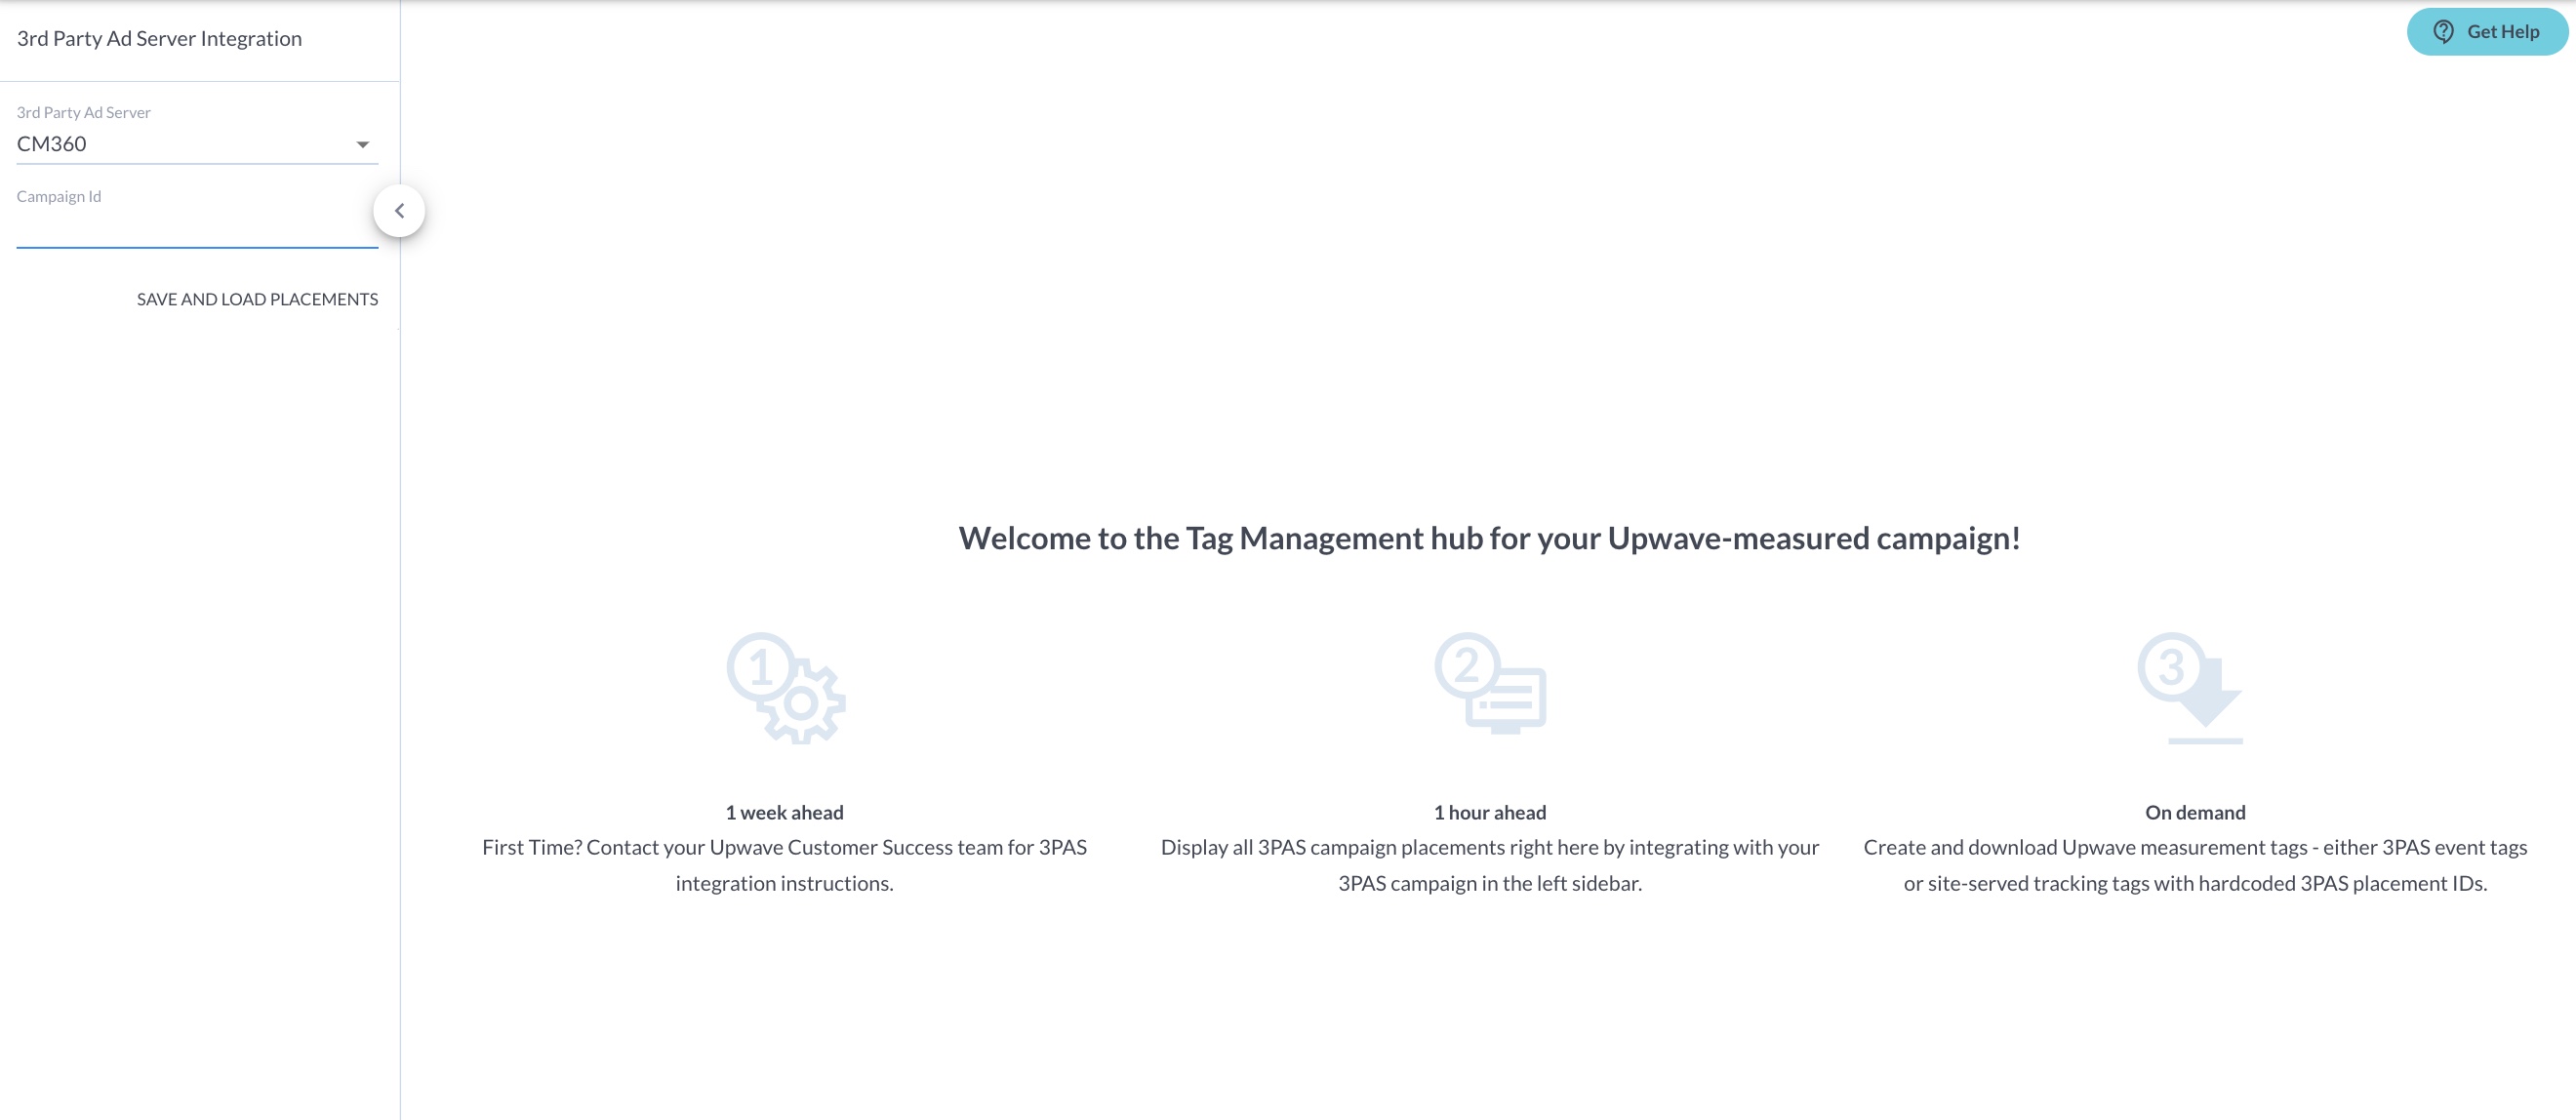
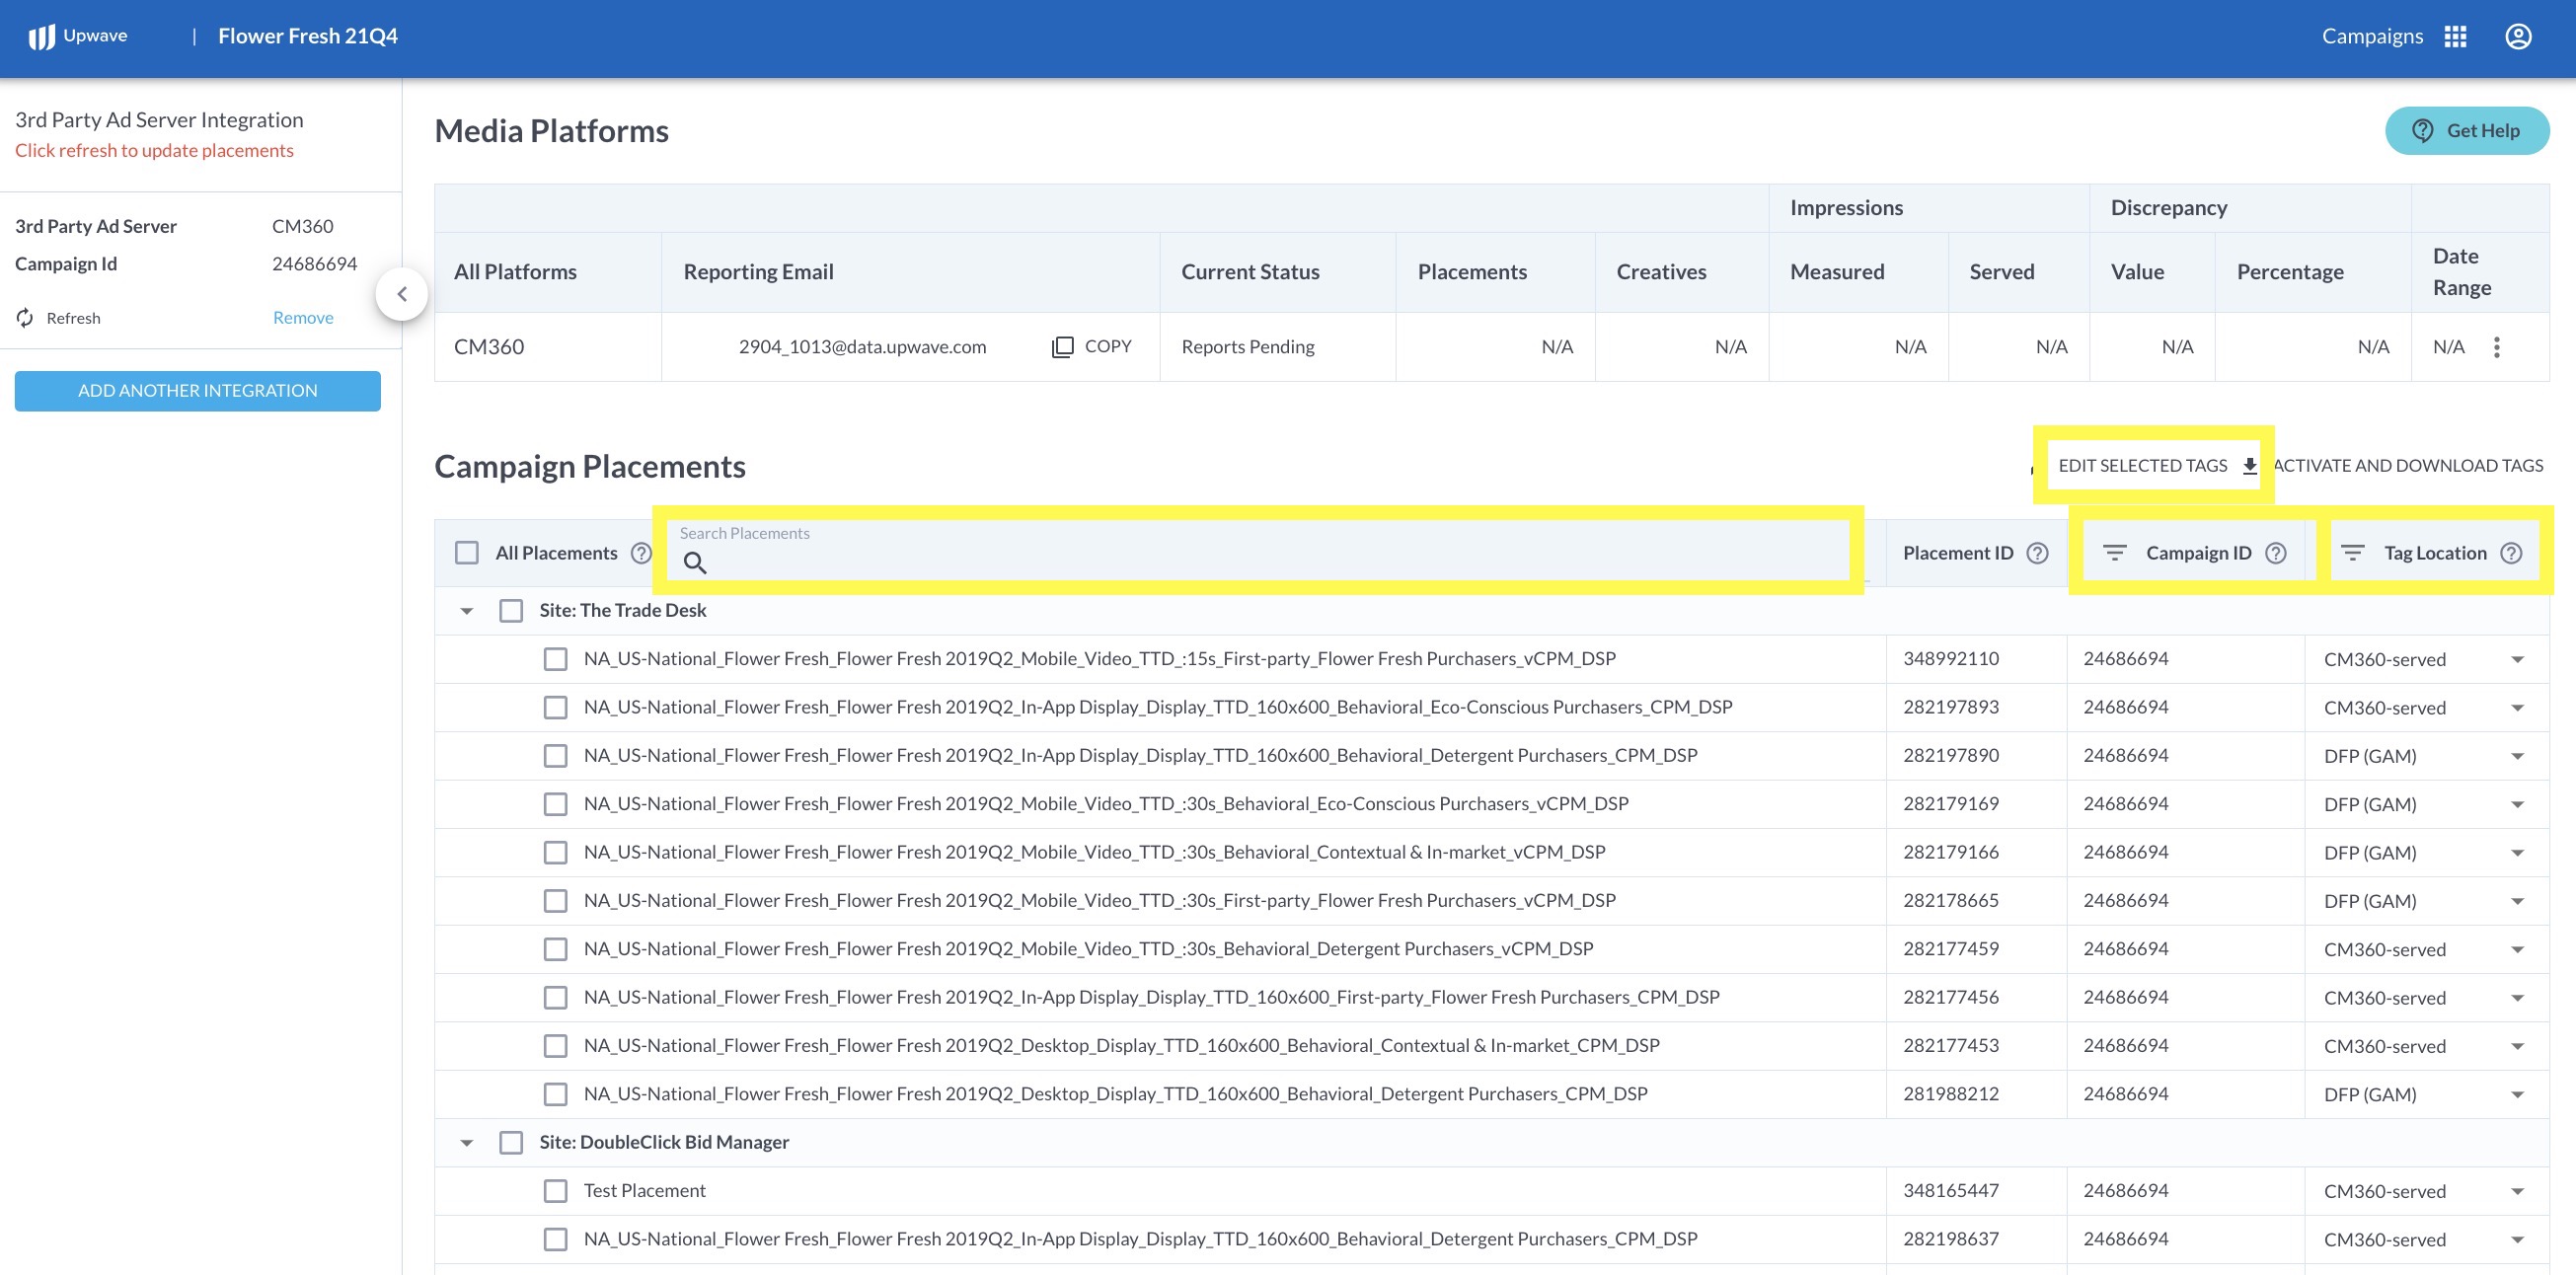
If this is the first time generating tags for that campaign, you'll be redirected to our integrated Tag Management page:
Insert your CM360 Campaign ID into the Campaign ID field. Then click "Save and Load Placements". This will load all Sites and Placements associated with that Campaign ID into your Tag Management page.
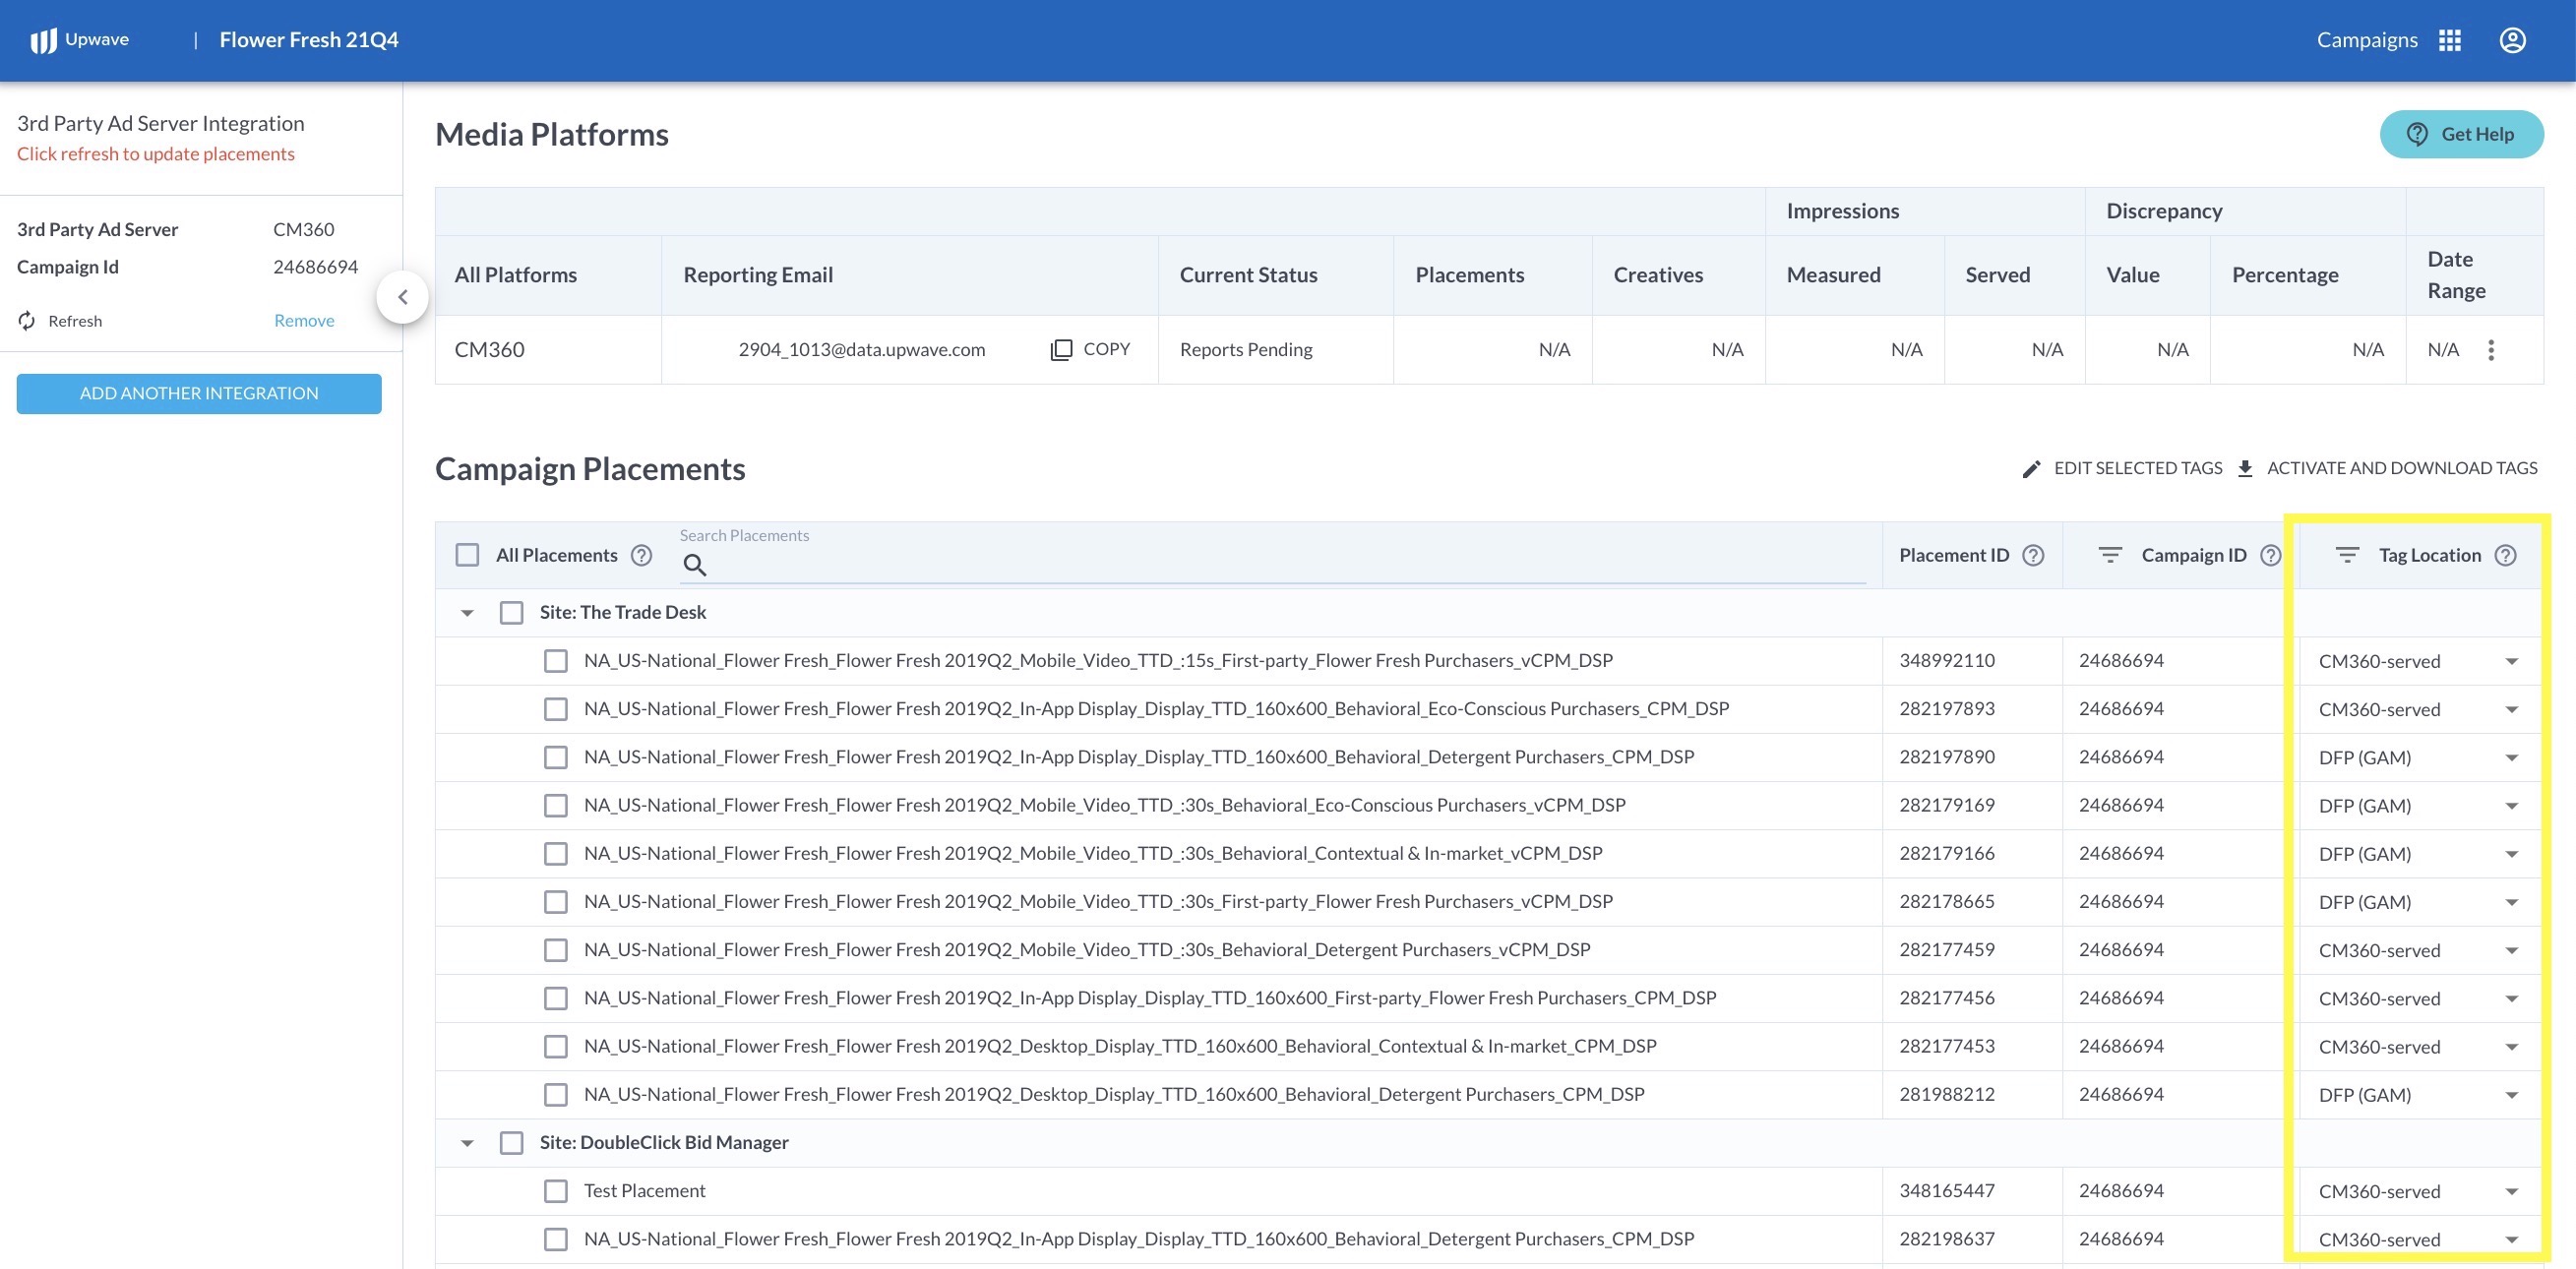
On the far-right, you'll see drop-downs for "Tag Location". This is where you'll designate where tags will be implemented so the correct tags are generated for those placements.
Below are the options available for selection:
CM360-Served: These placements' tags will be implemented (typically by your team) within the CM360 ad server.
Site-Served: These placements' tags will be implemented by your Site-Served partners in a variety of ad servers/publishers.
Note: Please connect with your Site-Served partners if you're not sure what ad server they're using. Making an incorrect selection could result in missed measurement for your campaign.
Note: If you are measuring Amazon placements, set those placements to "Not Measured" in your CM360-integrated Tag Manager. Instead, use our Amazon Integration to measure those placements.
Not Measured: These placements are not intended to be measured by the Upwave platform (and thus, don't require a tag).
Note: If you delete placements in your CM360 account, simply mark those placements as 'Not Measured' in your Tag Manager.
Not Specified: This is what all placements will default to upon import. It's best to update this ASAP upon import.
Tip! Use the 'Filter' and 'Search' features at the top to quickly set configure placements in bulk.
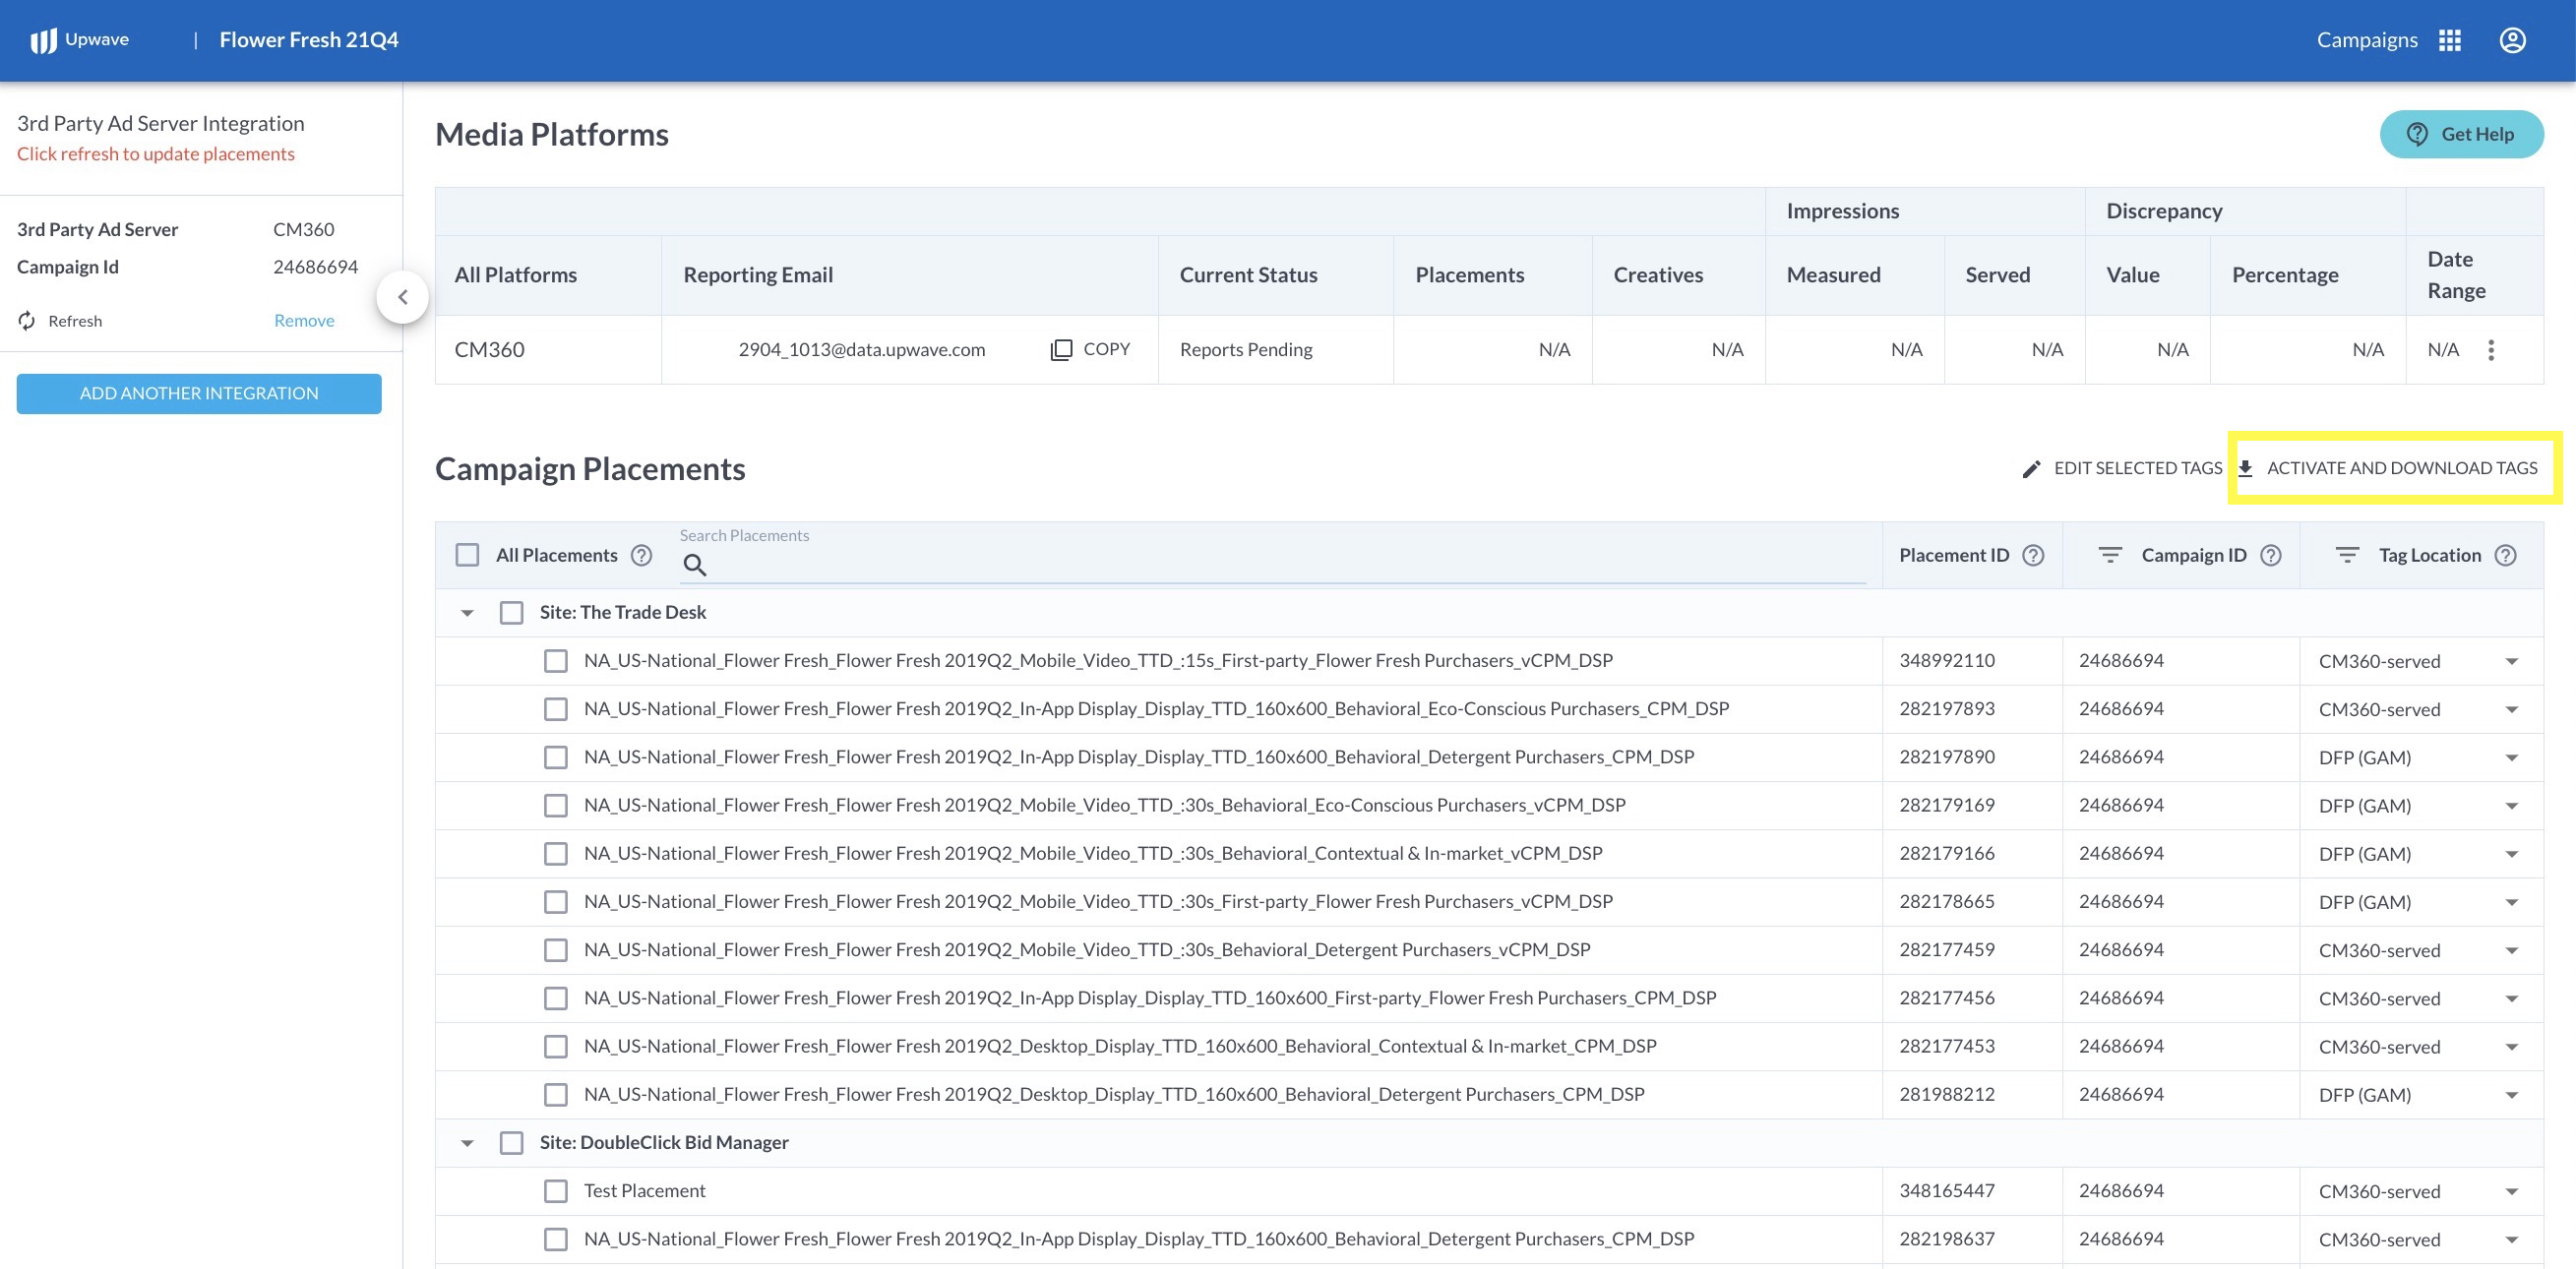
To retrieve your Upwave tag code(s), select the checkbox(es) next to your placement(s). Then click "Activate and Download Tags":
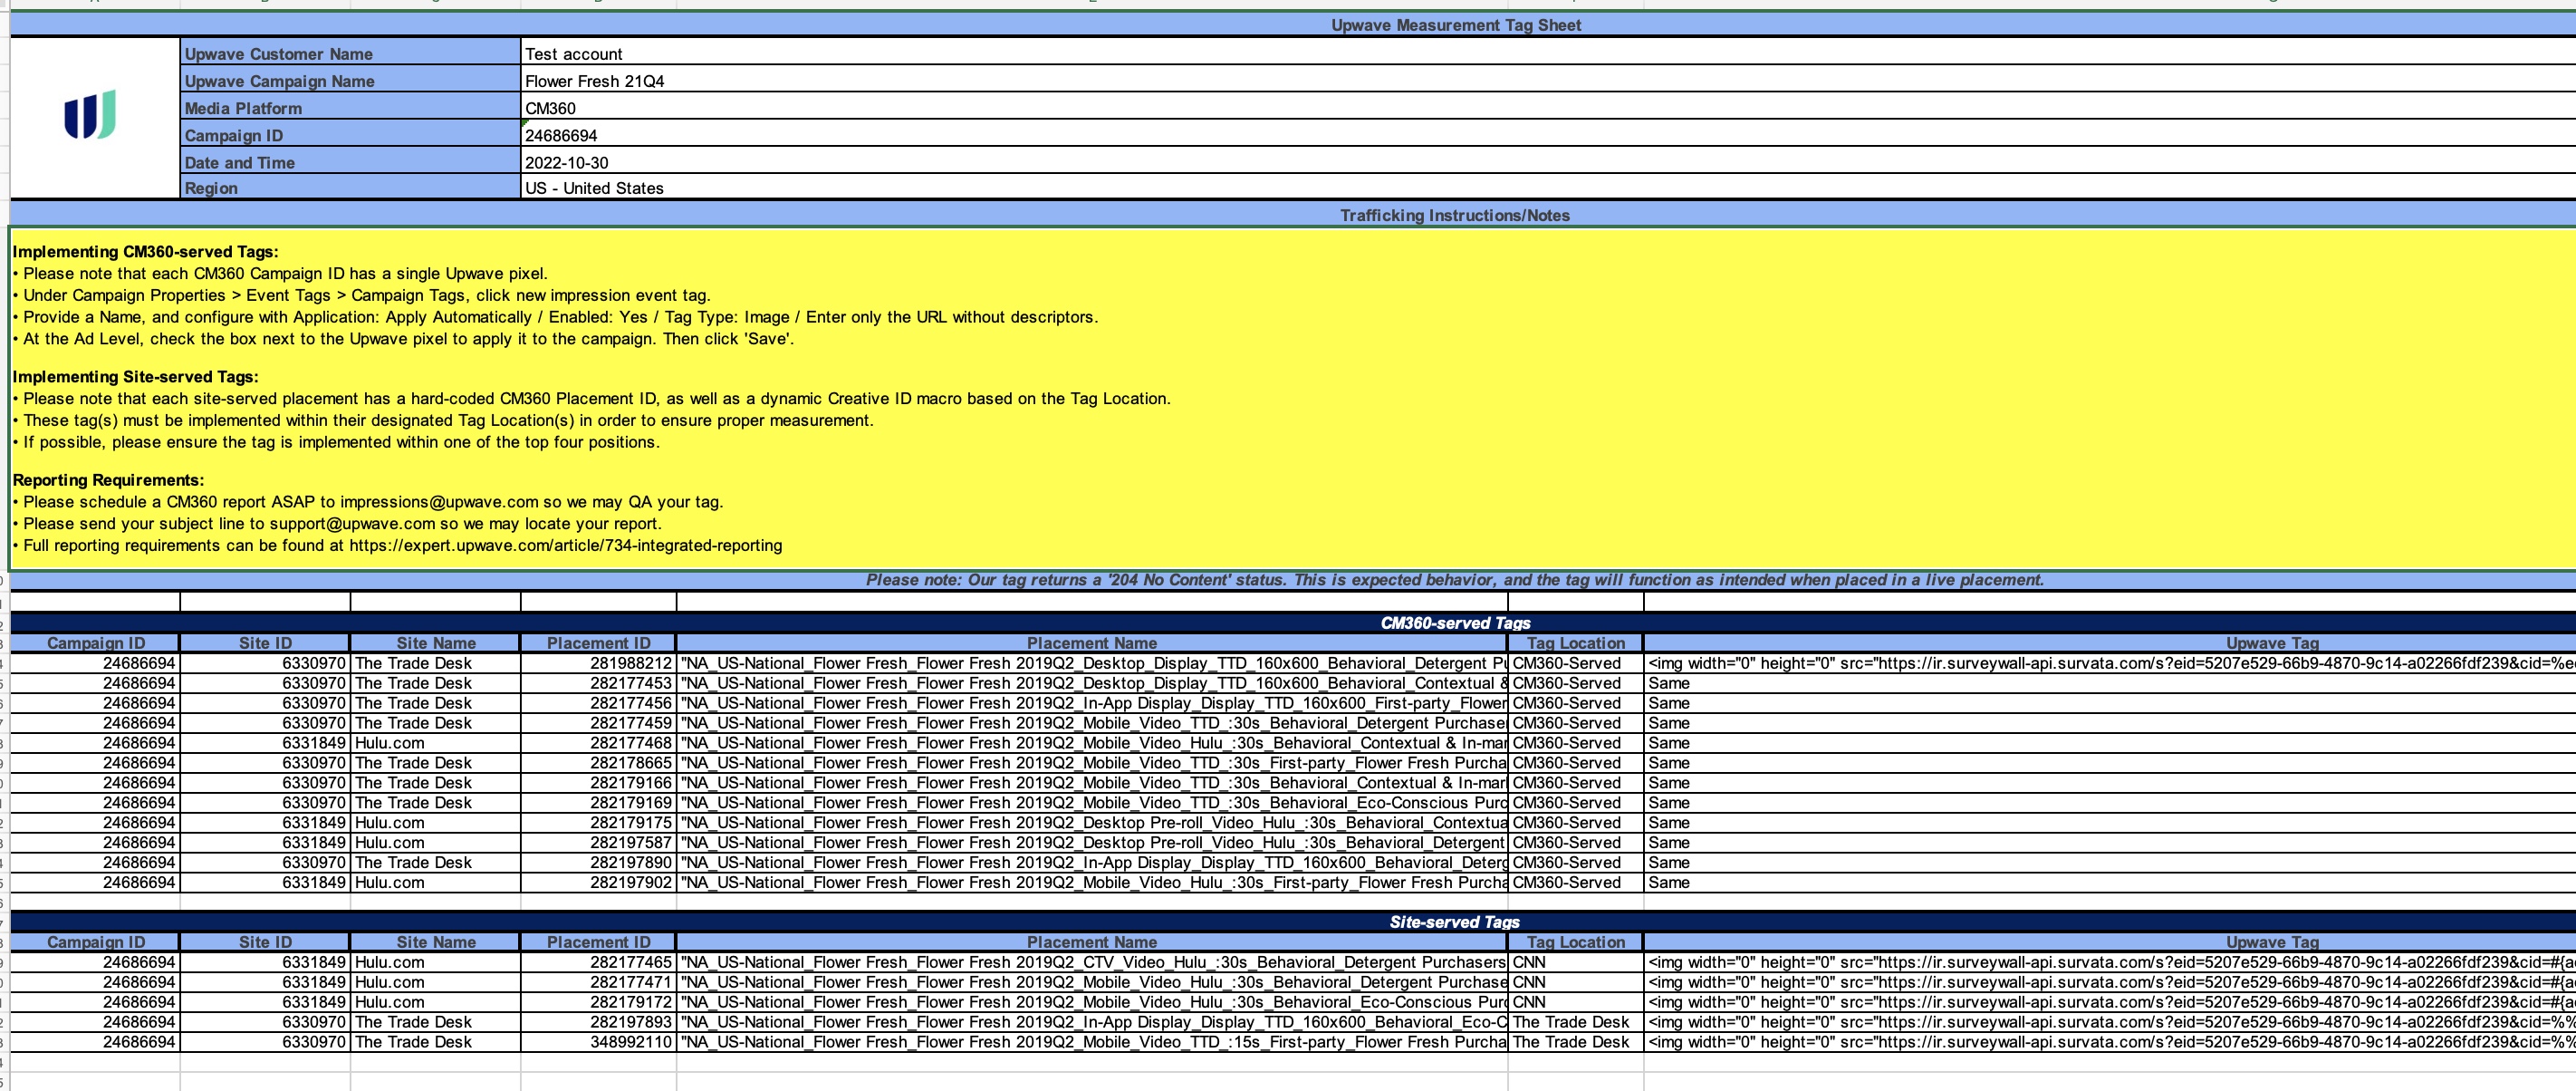
This will download an Upwave Tag File to your desktop:
Within your Tag File, you'll find the following columns:
Campaign ID: This is the Campaign ID associated with your CSM360 account.
Site ID: These are the Site IDs associated with each placement.
Site Name: These are the Site Names associated with each placement.
Placement ID: These are the Placement IDs associated with each placement.
Placement Name: These are the Placement Names associated with each placement.
Tag Location: This is the Tag Location in which that tag should be implemented.
__ Note: If the tag is implemented within a Tag Location that does not match this selection, it will not function correctly. This is because tags use proprietary macros that only expand when implemented within their designated ad servers. Please ensure you make the correct selections in your Tag Manager, and implement tags based on that selection, to avoid missed measurement.
Upwave Tag: This is the tag code that you will implement within the designated Tag Location. It is a standard image tag.
Implement Your Tags
CM360-served Placements
Please see this article for more specific instructions on how to implement tags within the CM360 ad server: CM360 Tag Implementation
Site-served Placements
Open your Tag File, and identify the tags associated with "Site-served" placements. These are the tags that you would distribute to your Site-served partners for implementation within their ad server.
Implementation instructions vary across ad server. Please see our tips for implementation listed below (and feel free to share with your Site-served partners).
Tips for Implementation
Tags must be implemented within the Tag Location(s) specified on your Tag File. Tags won't function properly in Tag Locations that they're not intended.
Don't modify the tag's macros, or macro order, as it impacts how we parse your data. Tags must be implemented as provided in the Tag File.
The tag should be implemented on all placements you want to measure, and none of the placements you don't.
Tags fire in sequential order, so ensure the tag is implemented within the top 4 firing positions for most accurate measurement.
Please note that when implementing, our tag returns a "204 No Content" status. This is a success code, not an error code. The tag will function as intended when placed in a live placement.
Schedule Required Ad Server Reporting
Please configure impression reporting from within your ad server promptly after the Media Start Date you have inputted on your Campaign Information form for that campaign; this date informs our platform when to start QAing your tag(s). Reporting facilitates that QA (via Discrepancy Reports), as well as assists with mapping your audiences shortly after launch.
Please see this article for more specific instructions on how to configure ad server reporting within CM360: CM360 Ad Server Reporting
