Campaign Implementation and SLAs
Conducting an Upwave measurement study is broken out into 6 distinct stages:
Campaign Creation
Tags and Ad Server Reporting
Generate and Approve Questionnaire
Campaign Launch
Early and Mid Campaign Reporting
Late and Post Campaign Reporting
Campaign Creation
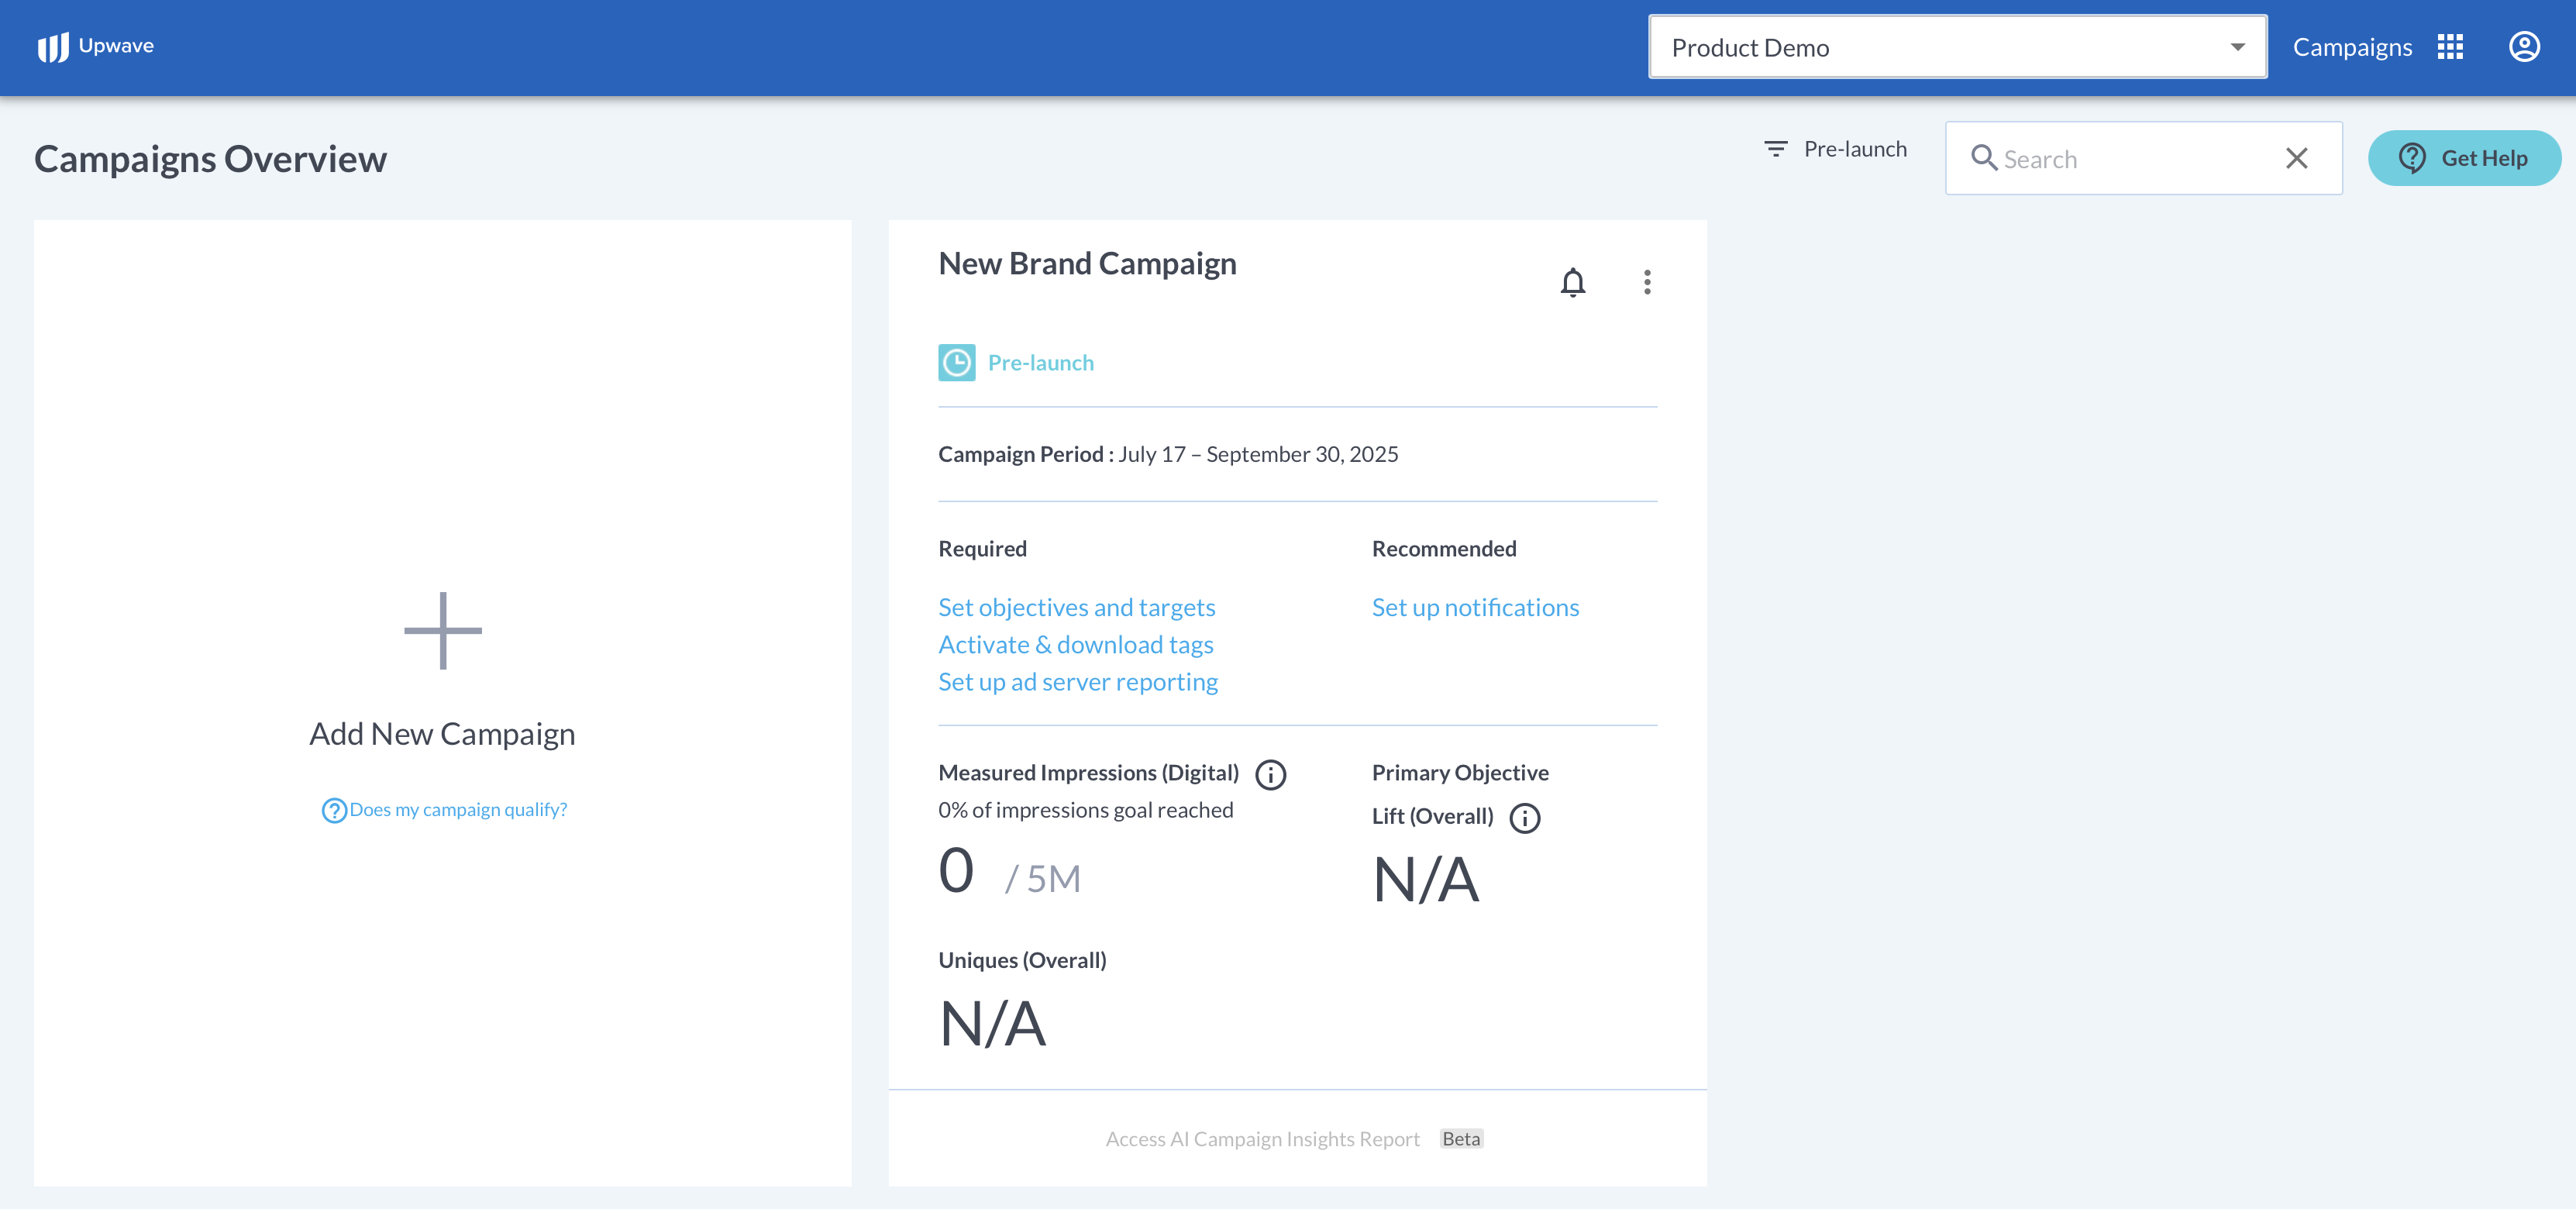
Create your campaign
When: 7 days before your Media Start Date
What: Create your campaign in the Upwave platform using the instructions here: Creating and Editing a Campaign. Be intentional when inputting your campaign information as these fields inform, and trigger, various Operational processes throughout the campaign's lifecycle.
Confirm your media flight dates
When: Ongoing
What: The Media Start Date and Media End Date inputted on your Campaign Information form should be accurate, and kept up to date if something changes. Otherwise, false actions and/or notifications will occur throughout your campaign. You can read more about Media Start/End Date implications HERE.
Invite new users
When: Ongoing
What: This step provides campaign permissions for users based on their Team. Please see these instructions for adding new users to your Team: Accounts & Login
Define your notification settings
When: Ongoing
What: Notification settings inform a variety of important communication lines throughout your campaign to ensure successful measurement. Be sure these are accurate, and kept up to date, so the right people receive the right notifications. You can read more about notification settings HERE.
Tags and Ad Server Reporting
Generate and download tag(s) using the Tag Manager
When: ASAP after campaign creation, or before your Media Start Date
What: Generate and download tags on-demand within the Upwave Tag Manager. Select the Media Platform(s) where your tag(s) will be implemented. Then, download and distribute those tags to your Ad Ops team and/or Site-served partners for implementation. Please see instructions below based on how you're tagging your campaign:
Implement tag(s)
When: ASAP after campaign creation, or before your Media Start Date
What: Tags must be implemented with the Media Platform for which they're intended; otherwise, they will not function. Please see instructions below based on how you're tagging your campaign:
Schedule Ad Server reporting to your tag(s)' designated Reporting Email(s)
When: ASAP after campaign creation, or before your Media Start Date
What: Ad Server reporting allows us to (a) QA your tags through Discrepancy Reports, and (b) map your audiences. To unlock these features, please see instructions below based on how you're tagging your campaign:
Monitor and resolve variances using Discrepancy Reports
When: Each time a Discrepancy Report is received
What: Discrepancy Reports are used to QA your tags. They are initiated within 4 business days of receiving your correctly configured ad server reporting (allowing time for initial reporting QA, and processing); then run regularly each time a correctly configured report hits the tag(s') designated Reporting Email(s). For a full explanation of what Discrepancy Reports are, why they're important, and how to use them, please see our article: Everything You Need to Know About Discrepancy Reports

Generate and Approve Questionnaire
Submit the Objectives & Targets form
When: ASAP after campaign creation (as this can delay launch)
What: Submitting your Objectives and Targets form is what initiates the Questionnaire creation process (see more about our supported Objectives and Targets). Please allow up to 3 business days to receive the Questionnaire after submitting your Objectives and Targets form. The Questionnaire will be sent to your Campaign Setup & Management contacts on file for that campaign.
Approve the Questionnaire
When: ASAP after receiving the Questionnaire for approval
What: You are required to approve the Questionnaire prior to campaign launch. Please note that there can be significant delays if there is friction over the Questionnaire among your stakeholders.

Campaign Launch
Upwave launches your campaign
When: The study will launch based on the Media Start Date you have inputted on your Campaign Information form, with a 3 business day SLA from date of Questionnaire approval.
What: Once the campaign is launched, your Upwave measurement study will collect exposed and control respondents until the Media End Date designated on your Campaign Information form is reached.
Review dashboard to monitor respondent collection
When: ~1 week after campaign launch
What: Data populates after 100 control and exposed respondents are collected (you will see "No Data" displayed until that time). Weighting and modeling are run each night, with updated cumulative reporting available next day.
Early and Mid Campaign Reporting
Populate Tactic Mapping document
When: ASAP after campaign launch
What: Tactic Mapping allows you to achieve cut-level insights within your dashboard. Please refer to these instructions when populating: How to Complete Tactic Mapping.
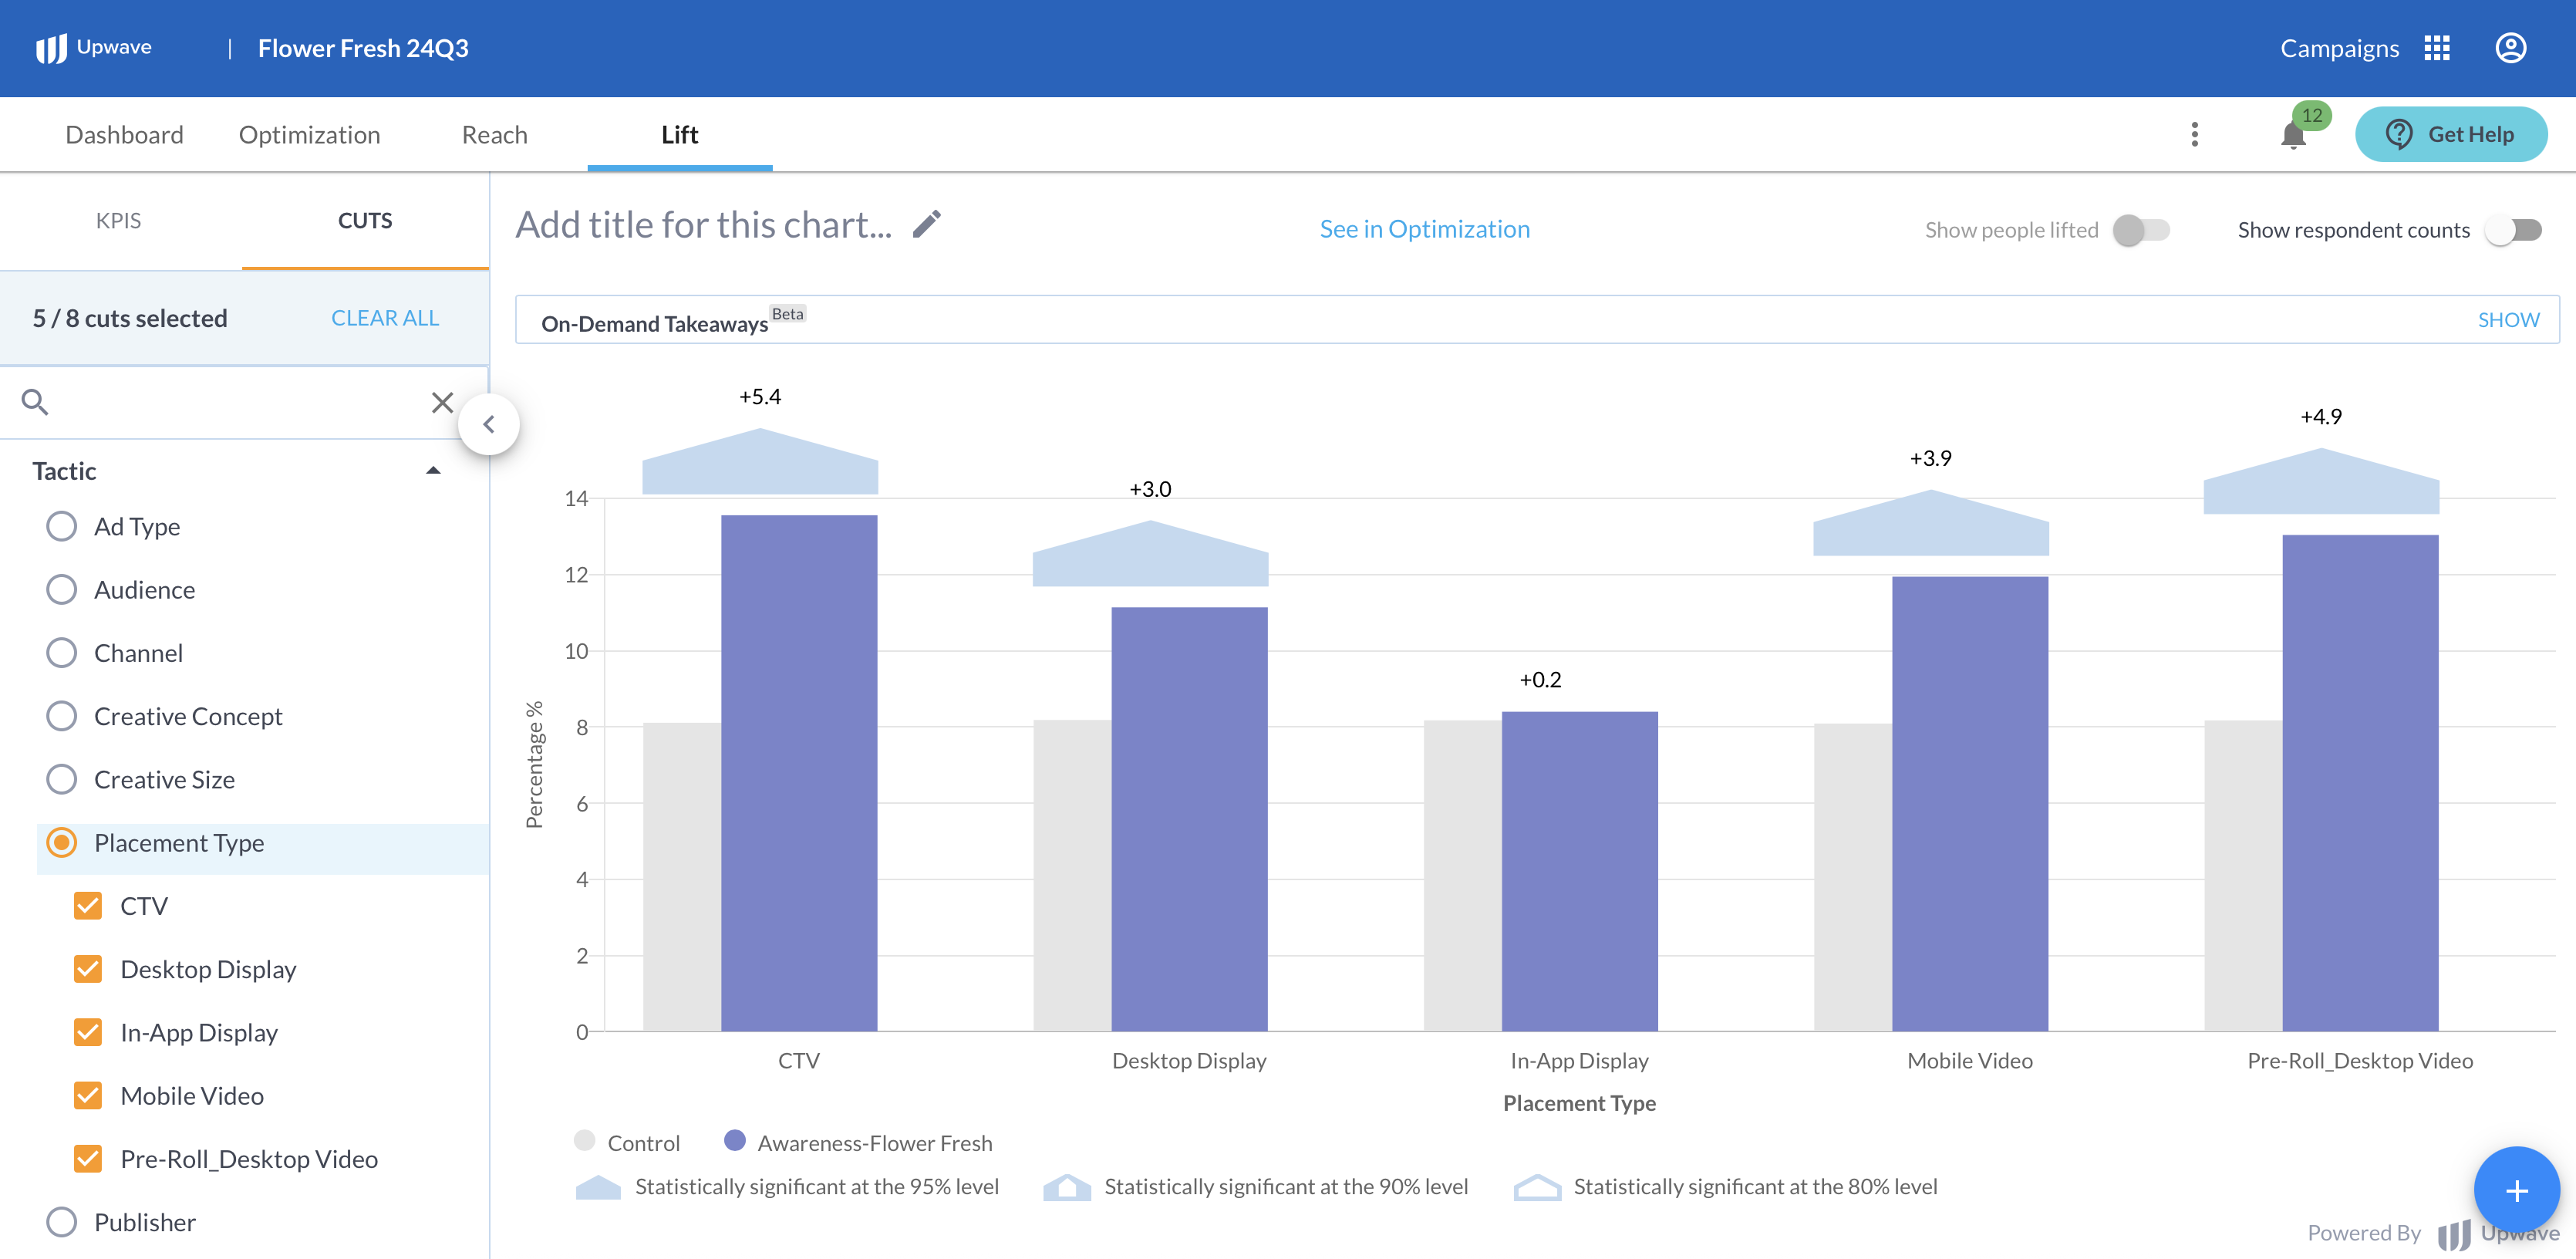
Review Lift, Optimization and Reach data
When: Your tactic mapping changes will typically be visible in your campaign dashboard next-day for automated templates, and within 3 business days for manual templates, after submission via the Tactic Mapping page.
What: Once you've completed your Tactic Mapping document and Upwave has applied it to your campaign, "tactic" cuts will be enabled within your dashboard. Optimization opportunities will then be generated and sent to your Opportunity contacts on the campaign, thus, empowering you to maximize performance.
Late and Post Campaign Reporting
Update Tactic Mappings as needed
When: additional IDs are available to map in the Tactic Mapping documents
What: Access your updated Tactic Mapping documents throughout the campaign to capture new units. Please refer to these instructions when populating: How to Complete Tactic Mapping.
Review Lift, Optimization and Reach data
When: Your tactic mapping changes will typically be visible in your campaign dashboard next-day for automated templates, and within 3 business days for manual templates, after submission via the Tactic Mapping page.
What: Updating your Tactic Mapping document may enable new insights within your dashboard such as new Cut Categories and/or cut-level reads. Optimization opportunities will continue being sent to the Opportunity contacts you have designated on the campaign.
Request custom/nested cuts as needed
When: Ongoing
What: "Custom Cuts" can be requested using the "Get Help" button in the platform (see detailed instructions HERE). Most often, these are used to enable "cross cuts" that can't be added to the mapping document itself. Please work with our Product Support Team to see if custom cuts are feasible and/or recommended for your campaign.
Modify campaign end date as needed
When: Before the Media End Date designated on your Campaign Information form
What: Your campaign will close based on the Media End Date that you have designated on your Campaign Information form. This field is editable until the campaign closed. As such, please be sure you keep this field up to date if your media is extended.
Review AI Campaign Insights Report
When: Ongoing and after campaign closes
What: One day after the campaign has closed (i.e. displays "Completed" in the Upwave platform), complete results are available. Click the "AI Campaign Insights Report" button to generate then access a complete results summary for your campaign. A notification is sent to Campaign Setup & Management members when complete results are available.